Click here for the Carousel Horse Pattern
Let’s go through a wood burning project step by step so you can see how a design is created.

 Step 1:
You will need your wood burning tool, a 9″ x 12″ basswood blank, a glazed tile on which to rest the tool, sand paper, tracing paper, water color pencils, scotch tape, and polyurethane spray sealer.
Sand the project board well before beginning any of the burning steps. Wipe with a clean cloth to remove the dust.
Rub the back of the pattern paper with the lead from a soft pencil. Tape the pattern to the project board and trace over the design lines.
Once the pattern has been transferred to the wood you can go over the pattern lines with your pencil to darken them as needed.
 Step 2:
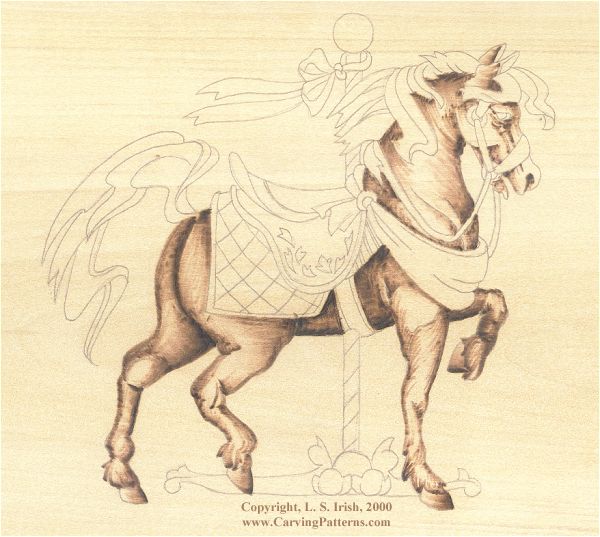
Using the side of the wood burning tools begin with the shading on the horse’s body. Note here that the two back legs are burned slightly darker than the foreground legs. The belly area also has extra darkness to it.
The center areas of each of the body parts have been left at the natural tones of the wood. This gives a feeling of roundness to the horse.
 Step 3:
Using the blade edge of the wood burning tool outline the horse’s body. Roll the tool between your thumb and forefinger to make the lines curve.
 Step 4:
Shading has been added to the horse’s mane and tail as well as to his saddle, bridle, and accents. Use the tool on it’s side. Change the coloring of the shading as you work. Some areas may have very dark shading where others might have a lighter tone. This adds interest to the work.
 Step 5:
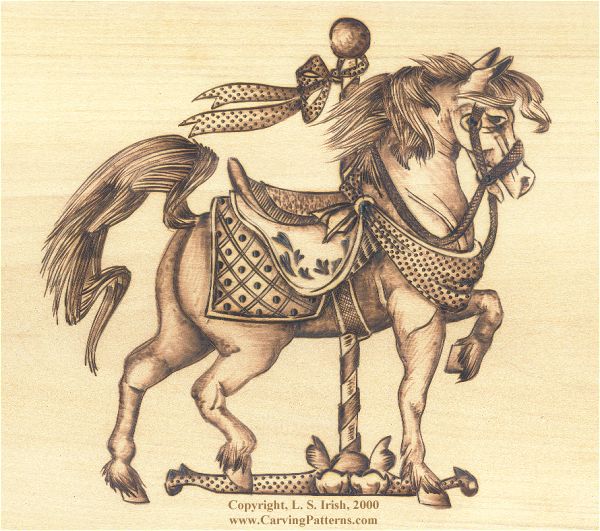
The detailing to the mane, tail, saddle, bridle and accents have been done. Study the close up photo of the horse for ideas on how each was accomplished.
 Step 6:
Coloring is easily added by using colored pencils over wood burned designs. I have used water color pencils that are applied as any other colored pencil except that they can then be blended with a small amount of water on a soft brush. This blending step takes away any lines left from the pencil work.
Because the pencil has a solid firm point only the top surface of the burning is colored letting all of your wood burning details and shading remain.
Once the coloring is complete give the piece several light coats of a polyurethane spray sealer, following the manufacturer’s instructions.