 17. Here’s a simple diagram.
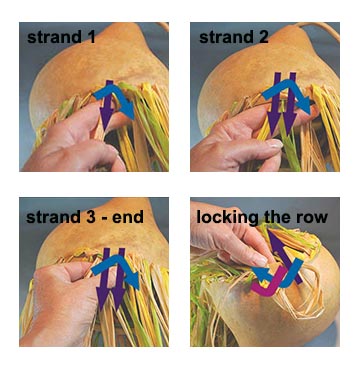
Strand one is laid over the strand two.
Strand two is laid over the folded down strand 1 and over strand three.
Strand three is laid over the folded down strand 2 and strand 4.
The last strand is threaded through the loop of strand 1.
Did you know – If you are working a round reed braided rim from a wide opening into a gradually narrowing opening you can work two strands together when the cross-over becomes to compact. On the next row, drop one of the strands inside of the gourd and continue braiding. After the braid rim is complete cut the dropped reed to 1 1/2″ and tuck it under the braid.
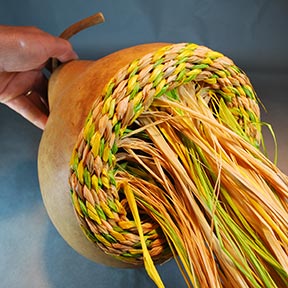 18. As you work each new round of braiding mist the strands as necessary to keep them slightly damp and easy to fold.
Check each row for loose loops and missed strands of raffia. It is easier to make adjustments as you work the rows than to try and adjust when your loose loop is several rows down the work.
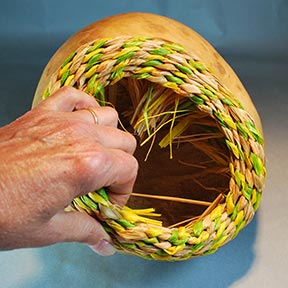
19. Comb the loose raffia strands with your fingers, tie them together into a bundle using a scrap length of raffia. With scissors, cut the raffia to about 2″ long from the top row of the gourd. Tuck the loose ends under the braided rim.

20. If you are working your braid using raffia you will need to secure the braid and the raffia ends using a hot glue gun. Allow the raffia to dry overnight before you glue the rim.
If you are working with round basket reed, cut the reed to 1 1/2″ long at the end of the last round. Roll the ends under the braid. Roll the braid over the gourd edge, gently pressing it into position. Allow the reed to dry.
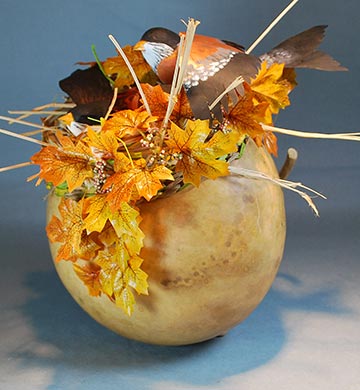 21. Your gourd is ready for your decoration. For this Autumn Bird Nest I rolled the cut raffia strands from the braiding into a bird’s next shape and tucked it into the braided rim opening. The robins – one inside the nest and the one sitting on the rim – are hand whittled from basswood squares with copper sheeting wings and tail. A few silk maple leaves add the final details.
 Please visit Art Designs Studio, home of Lora S Irish patterns.
Discover the fun of whittling your own fish and bird decoys with this e-project, American Folk Art Ice Fishing Decoy Carving.