Introduction

When creating a wood burning project it is often fun to add lots and lots of color to the design. There are several methods for adding coloring. In this tutorial we will talk about using watercolors as your coloring agent.
Watercolors are finely ground pigment mixed in a water based float. Because the base float has no coloring of it’s own the finished look of watercolors is extremely clear and crisp. This avoids the problems of cloudiness in the darkly burned areas that can occur with colored pencils and the heavy look of thinned acrylics or oils.
Whether you are using tube or cake, watercolors need to be thin heavily with water when used on wood project. Your basswood will quickly absorb any color that you apply, the heavy thinning will aid you in controlling how much color goes on with each step. Thin the colors until the hues almost disappear on your tile.
You only need to wait a few moments between each coat. Simply allow any wet or glossy look to disappear the proceed with the next step. Plus they are great to work with around the house, no smell, no messy solvents, no flammable rags!
Once the project coloring is completed apply several light coats of spray polyurethane to set the color. High gloss, semi-gloss and matte or satin finished will compliment the project.
Free LSIrish.com Tutorial Pattern

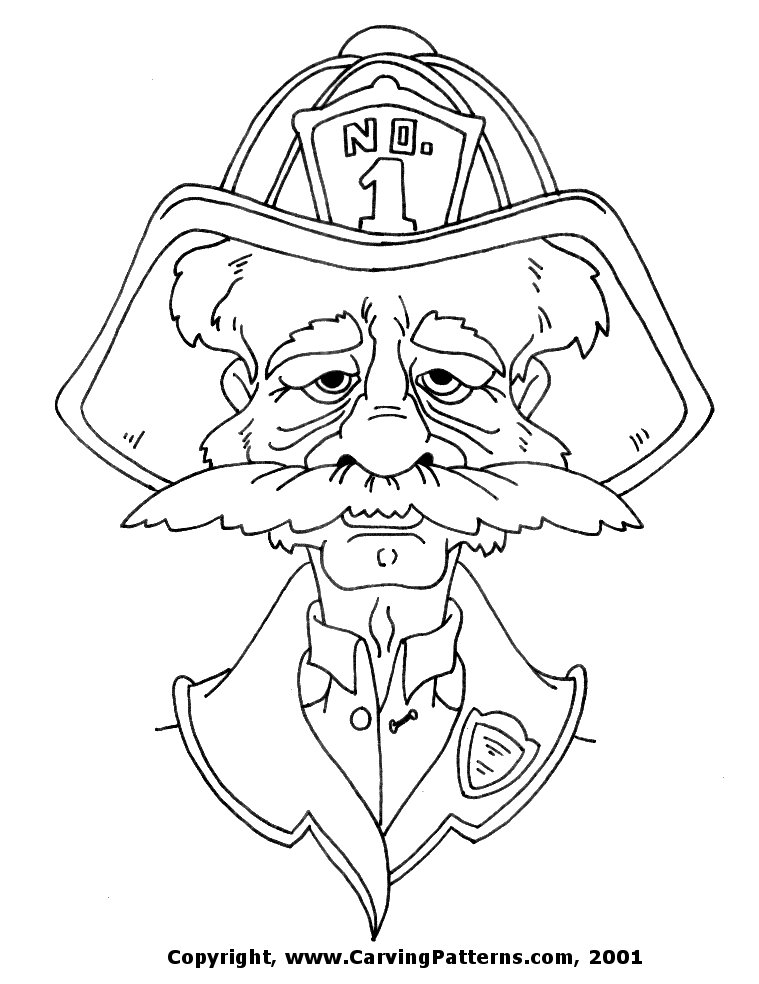
This pattern has been worked on a 9″x12″ oval, 3/4′ thick basswood plaque. Begin by rubbing the back of your pattern with a soft pencil to create an even layer of pencil carbon. Tape the pattern face up onto the plaque and trace along the pattern lines. This will leave a fine pencil carbon line tracing on the plaque that can be erased later. Click image for your Free Wood burning Pattern.
Offered courtesy of Art Designs Studio.
For Personal Use Only.
Step 1 Work the pyrography steps of your portrait.
Wood burn the shadowing and detailing to your design. To learn more about Wood Burning please see our tutorials.
Woodburning 101:
The Basic Woodburning Tool
Basic Woodburning Strokes and Textures
Woodburning Scene Samples
Step by Step Instructions Project
Working With Watercolors
Adding Skin Color to your Portraits
The Color Wheel or Who is Roy G. Biv?
Wood Burning Sepia Values

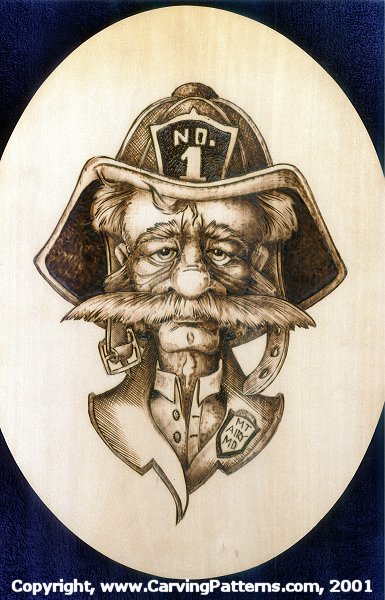
 Step 2 Establish where the shadows will fall in the face.
After the pyrography work is complete use a white artist eraser to remove any remaining carbon paper lines or pencil lines left during the tracing steps. With very fine sandpaper, 320-grit, lightly sand the surface of the burning to remove any loose burnt fibers created during the hot temperature burn steps. Wipe the burning with a slightly damp cloth, then allow to dry thoroughly.
Place a small amount of each watercolor that you will be using onto a tile or palette. So you work each color thin that color with a few drops of water. The more water you add the paler or more transparent that color will appear on your board.
Begin with the face tones and establish which side of your design will be the shadow side and which will be the highlight side. To chose the right color mix for your skin please see:
Adding Skin Color to Your Portraits
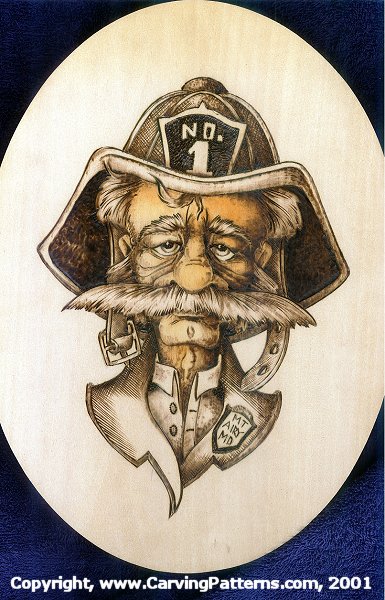
 Step 3 Work a thin coat of each color to each elements in the design.
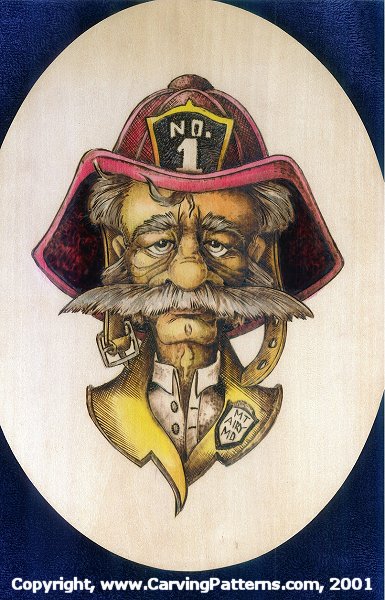
A thin coating of Cadmium Yellow has been mixed and applied to the coat and hat badge. Note how the yellow in the clothing tones down the “green” look of the face. Also note how beautiful your dark burned shadows show through the yellow, a color that often clouds when using colored pencil.
Brown-black is added to the hair, beard, mustache, and eye brows. Raw sienna is used for the leather strap to his hat and Cadmium Red Medium is applied to the hat. Note how the addition of red to the work tones down the “green” look to the face even more. Because the gray tones of the hair are created with watercolors there is no whitish or opaque look in the hair areas.
 Step 4 Thin coats of watercolor allow all of the pyrography tonal values to show.
Brown-black is added to the hair, beard, mustache, and eye brows. Raw sienna is used for the leather strap to his hat and Cadmium Red Medium is applied to the hat. Note how the addition of red to the work tones down the “green” look to the face even more. Because the gray tones of the hair are created with watercolors there is no whitish or opaque look in the hair areas.
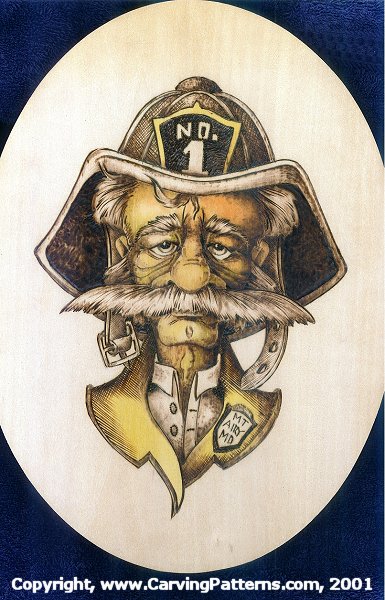
 Step 5 Each watercolor area can be shaded using complimentary colors or deeper tonal values.
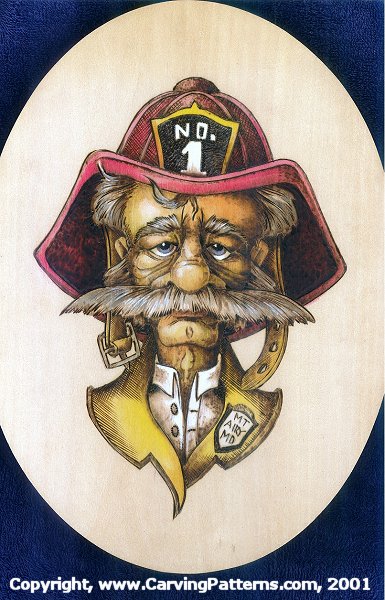
A shadow coat for each of these colors has been added. Along the collar is a second coating of Cadmium Yellow. The hat has a second coat of Cadmium Red to all areas except the hat ribs. The gray is made more intense throughout the hair areas. For a very strong look to the coloring a third and fourth coat could have been added, our sample is just two coats of color per area.
Since there is no true white watercolor for highlights and white areas change to Titanium White acrylic. Use this exactly as you have the watercolor, heavily mixed with water and in light successive coats. White is added around the eyes, face highlights, shirt, collar badge and hat number.
At this point every area that was wood burned now has a coating of watercolor. Note how clear the dark areas inside the hat, around the back of the collar, and in the face are.