Scroll Sawing the Wood Spirit Face
Scroll Sawing the Wood Spirit Face
Cross-Crafting Seminar Introduction
Cross-Crafting Seminar Supply List
Cross-Crafting Seminar Free Patterns
Cross-Crafting Seminar, Scroll Saw Basics
Cross-Crafting Seminar, Setting Up Your Scroll Saw
Cross-Crafting Seminar, Scroll Sawing the Wood Spirit Face
Cross-Crafting Seminar, Wood Burning the Wood Spirit Face
Cross-Crafting Seminar, Colored Pencils for the Wood Spirit Face
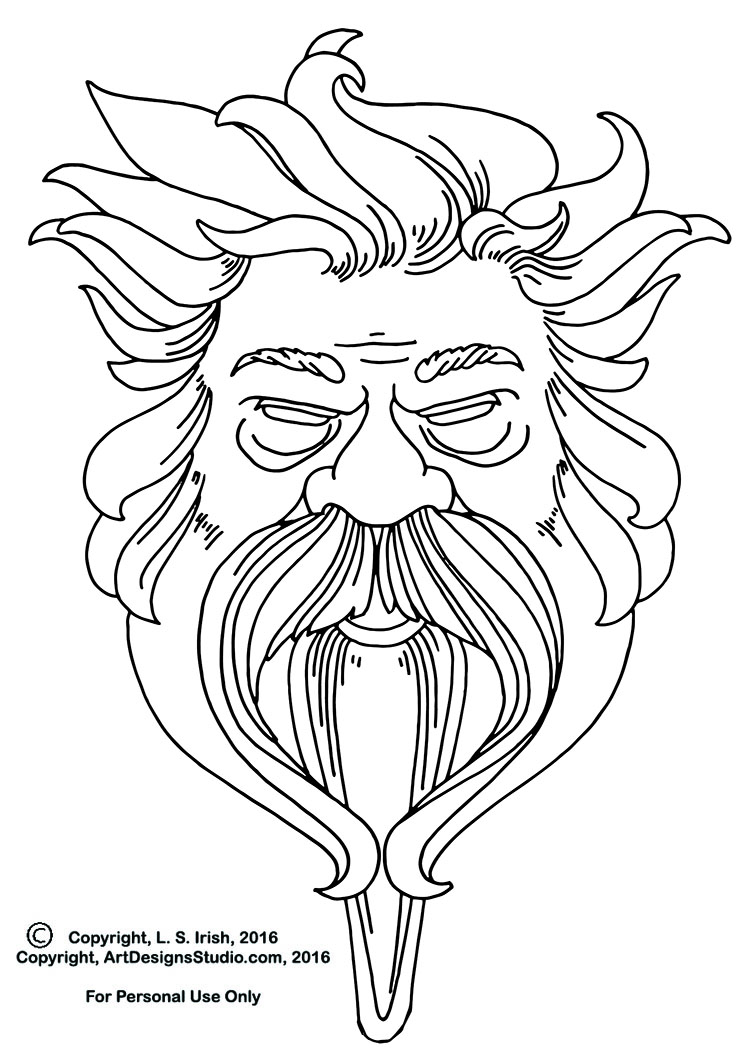
Our next step in our Cross-Crafting Seminar, which takes a look at using scroll sawing, wood carving, pyrography, and colored pencil work in one project, is to do a test cut. Let’s use a classic Wood Spirit face for this practice session. This face comes from my book, Wood Spirits and Greenmen, and the pattern is linked below.
Click on the pattern image to open a new window with the full-sized pattern. Save a copy of the pattern to your desktop, where it will be easy to find later.
 Supplies
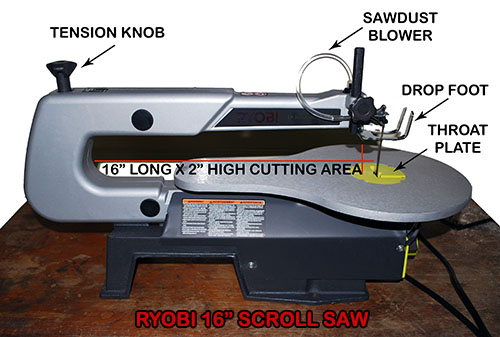
Ryobi 16″ Variable Speed Scroll Saw
Ryobi 15 TPI Regular Tooth Saw Blade for general scroll saw work
Temporary Adhesive Spray
2 – 12″ x 12″ x 1/8″ sheets of birch plywood
220-grit sandpaper
Sheet of heavy brown paper bag
Green painter’s tape
2 printed copies of the Wood Spirit pattern
Note: I buy my birch plywood and basswood off of Ebay.com because I can see the actual pieces of wood that I am purchasing. Birch plywood is often available at your local hardware store or large box craft store.
Preparing for Cutting
 Step 1 For this step-by-step I am going to cut two plywood wood spirit faces at the same time. This is called gang cutting.
Lightly sand both sheets of birch plywood on both sides using 220-grit sandpaper. Work the paper in the direction of the grain lines of the birch wood to avoid creating small, cross-grain scratches. Wipe the plywood with a clean, dry tact cloth. Crumble a large sheet of heavy brown paper bag into a loose ball. Use the crumbled paper to sand over the surface of both sheets of plywood. Brown paper bags are wonderful, extremely fine sanding papers.
Step 2 Print two copies of the pattern. One will be used to cut the Wood Spirit face shape from the wood. The second will be used to trace the Wood Spirit detail lines to the cut-out, scroll sawed shape.
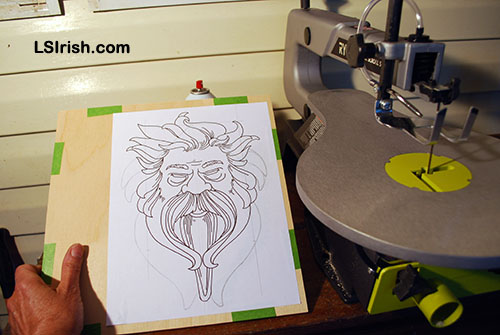 Step 3 Stack the two sheets of plywood with the best sides facing each other, these will be on the inside of the stack with the rougher sides facing outward. Use several strips of green painter’s tape along the edge of the stack to secure the two pieces together.
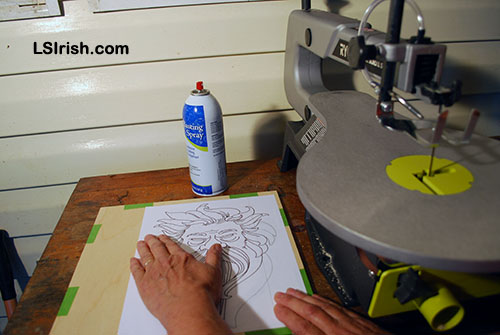
Step 4 Read the directions on the side of your temporary adhesive spray, and follow those directions to spray the back – reverse – on your cutting pattern. Place the pattern, face up with the spray adhesive against the wood. Lightly rub the paper pattern from the center out towards the corners to flatten the paper and insure that it is completely adhered to the wood. Let the paper dry for a few minutes before you beginning your scroll saw work.
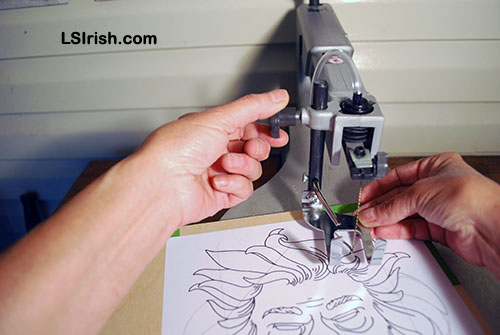
Step 5 If this is your first scroll saw session, please read all of the instructions and safety procedures that came with your model of scroll saw. Insert a 15 TPI regular/general cutting blade in the saw. Remember, the teeth of the saw blade point down.
Note: When I am cutting out a general shape, as with the Wood Spirit, I am not as concerned about exactly following the pattern line as cutting a smooth line! You will see that in some areas I may have cut inside or outside the pattern line. Since no one but me and you will ever see the original pattern whatever I cut will become the final items. So relax, have fun, and know that it is so OK to wander off the line. This is meant as a practice piece, a piece on which you can learn, experiment, and make mistakes.
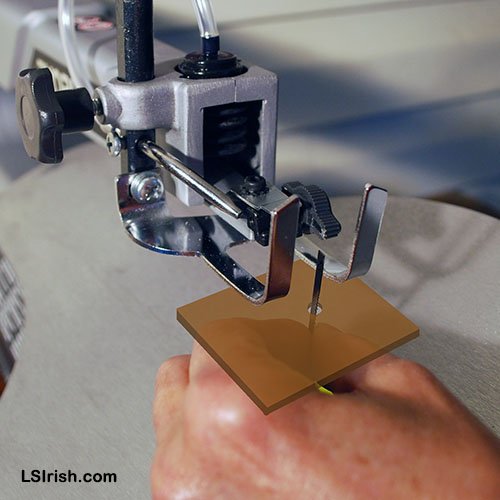
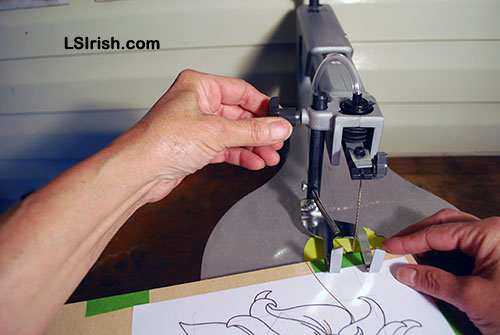
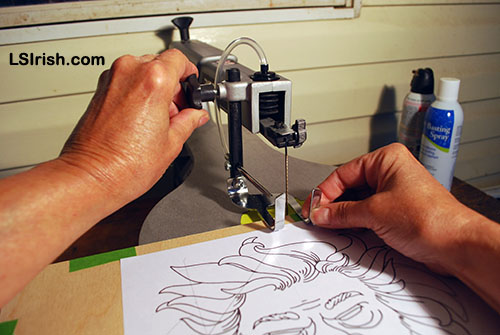 Step 6 Loosen the Drop Foot Knob on the left of the scroll saw arm. Allow the Drop Foot to lower onto the plywood. Tighten the Drop Foot knob. This foot keeps the wood held tightly against the work table, stopping the wood from vibrating as the blade moves through the cuts.
Do not add any pressure to the Drop Foot. By just setting it on the board you are cutting it will have the correct pressure when you tighten the knob.
 Step 7 Begin your first cut at the top of the board, cutting towards the head, following one of the hair strands. Start the saw before your blade touches the wood, then glide the wood into the working saw blade. Move slowly, allow the blade to do the work for you. Stop the cut when saw blade’s motion when you reach the inside angle or v-shape point of the hair strand.
 Step 8 Turn off the saw, lift the Drop Foot by releasing the Drop Foot knob, and back the blade out of the cut and out of the board.
 Step 9 Make the second cut, starting at the top of the board, cutting towards the head, on the second side of the same hair strand. Stop the cut when you meet the end of the first cut.