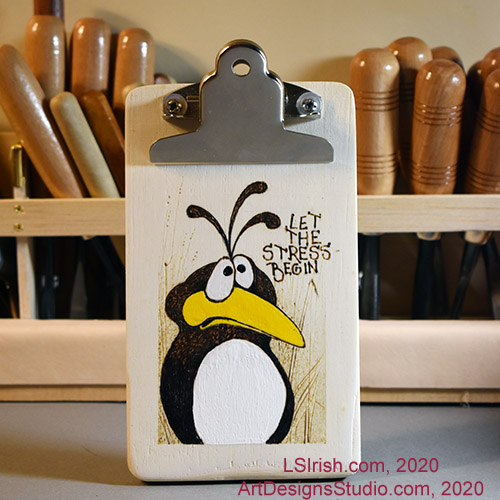
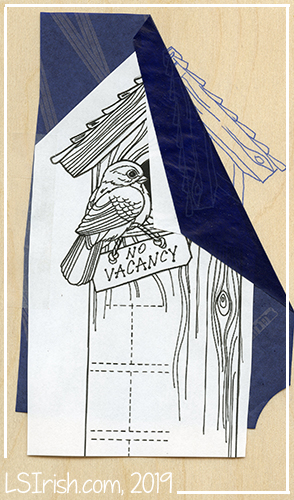
This little “Let the Stress Begin” Bird Pattern for pyrography and wood carving is worked on a mini-clipboard that measures 6 1/2″ high by 4″ wide. The outer 1/2″ edge of the clipboard was covered with painter’s tape after the pattern was traced. This protects that area of wood from being burned and when it is removed you have a clean, straight-lined border.
This is a simple silhouette burn on a high setting for your wood burning tool for the bird’s outline and body fill. The background grass was worked using a ball-tip pen on a medium temperature setting.
The white and yellow were added after the pyrography was completed using acrylic craft paints. After they dry finish your wood burning using your favorite spray sealer.
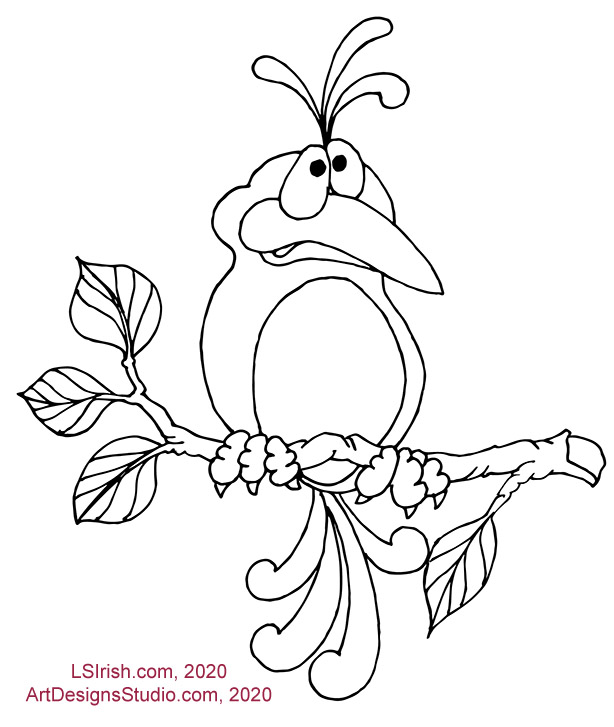
Please click on the image above to open a new window with the full-sized – 7″ x 10″ – pattern.
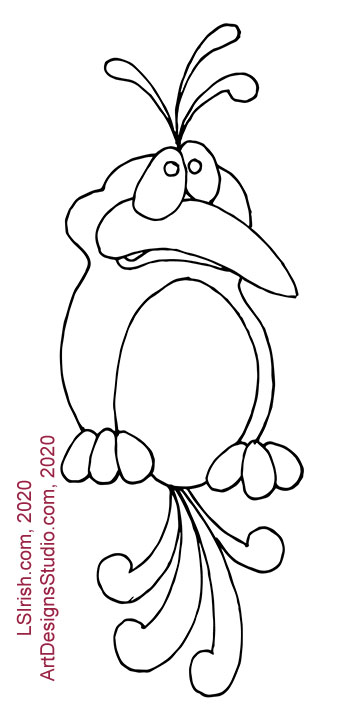
Please click on the image above to open a new window with the full-sized – 7″ x 10″ – pattern.
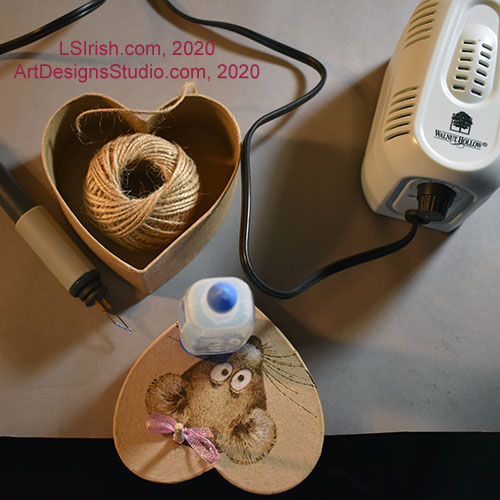
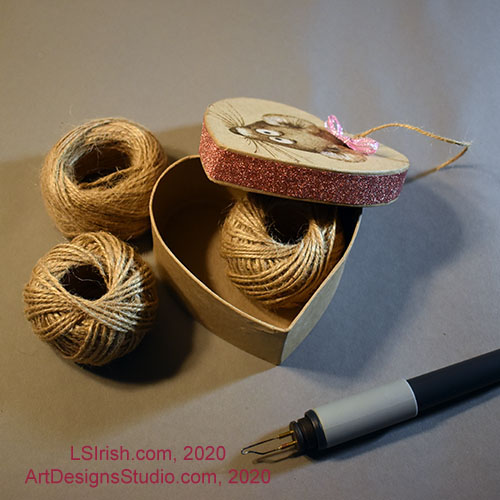
I use little bits and scraps of twine all the time in the studio. But after an hour of searching for my current twine ball I decided it was time to make something specific just to keep that bit of string easy to locate.
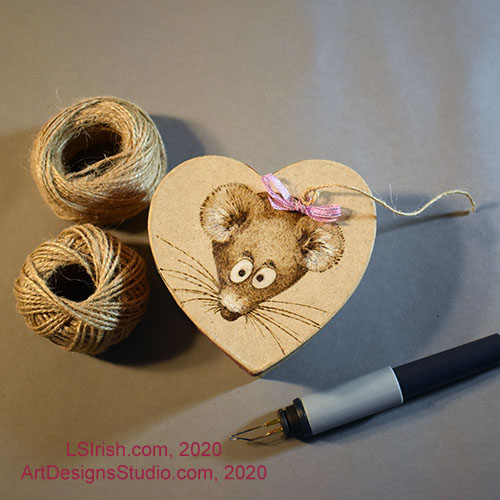
A few ovals as my guidelines, made with a #4 soft pencil, create my mouse’s face and ears. Working with my ball-tip pen and as hot a setting as the Walnut Hallow will take I began the burn. Paper, especially paper mache, needs a high setting to burn both the paper and the glue content of the mache.
White colored pencil highlights her eyes, nose, and a few of the long hairs inside her ears.
After the burn was complete I used my bench knife to cut a small 1/8″ diameter, hole just above her ear, through the heart box lid. Next, using my ball-tip pen on its highest setting I cleaned the sides of the hole by burning around the cut edge.
Now I grabbed a bamboo skewer that fits the hole I just created. I wrapped a 1/4″ ribbon into a bow around the skewer, added a little glue to just the ribbon, and drop the skewer into the box lid hole. The skewer holds the ribbon in place while the glue sets. While that is drying you can add a 1/2″ wide ribbon along the outside edge of the box lid to add a little more sparkle.
After the glue on your ribbon has dried, gently remove the skewer. Put your twine ball inside the box. Thread the edge of the twine through the box lid hole, leaving about a 6″ tail. Loosely tie the tail twine in a simple knot and move the knot against the box bow.
Your twine end will stay in place, and be ready to give you that next piece of twine scrap that you need.
In wood crafting – wood carving and wood burning – patina is the natural color change that any wood surface goes through with age because of oxidation. This darkens the wood because the iron in the wood begins to rust over time. A clean, fresh piece of white pine will turn into a deep golden-orange color as its patina develops.
This morning I have been taking photos for my next book with Fox Chapel Publishing and needing a backdrop I grabbed one of my very first relief carvings – a photograph box. But even before I got it to the photography table I knew that carving desperately needed a good cleaning. What I am posting is the same procedure that I use of my wood burnings.
Because we display our carvings, handle our carvings, and use many of them on a daily bases our artwork does begin to pick up an ugly layer of common household dirt that both dulls the surface finish and begins to fill in that fine detail carving that you worked so hard to achieve.
This project was carved in butternut, circa 1995, and used in my first book Classic Carving published by Taunton Press. Over the twenty years of being used as either a jewelry box or photo box, the lid had become quite dingy.
Note here, this is not some precious 200 year old antique … at least not yet!
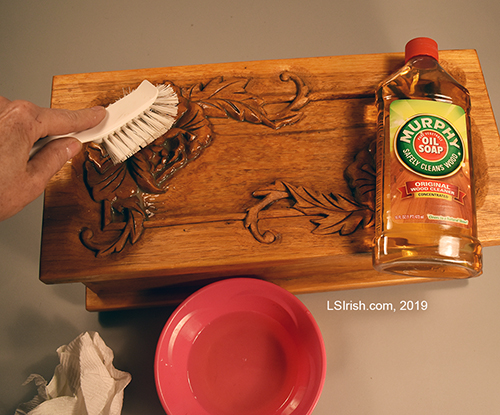
I use Murphy’s Oil Soap. Murphy’s is a concentrated wood cleaner that is safe to use around children and pets. Not only can it be used on raw wood but also over most of your polyurethane or acrylic sealers. Remember to do a small test on the bottom of your project before you work the carving.
Dust your work well before you begin. Use condensed air to clean what you can out of the deep details.
Mix about 1 cap of soap with 1 1/2 cups of warm water.
With a kitchen dish washing brush, work one coat of soapy water over the surface of your carving. Let the soap mix sit on the wood for a few moments so that it can loosen the dirt.
Gently scrub over your carving or burning with the kitchen brush to lift the dirt.
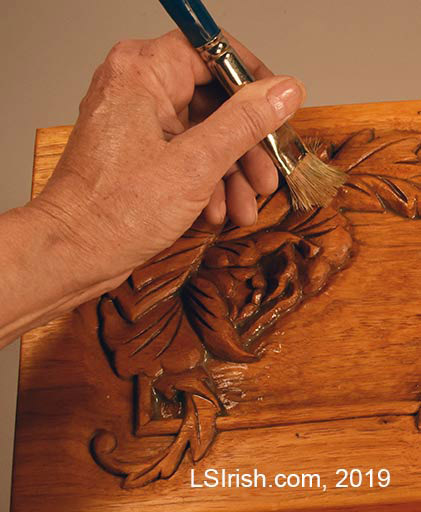
With a large ox-hair brush, work the puddles of dirt out of the crevices and corners.
Use a clean, lint-free cloth to rub away the dirty soap. You do not need to or want to rinse your work after you have wiped the wood. The oil in Murphy’s will refreshes your wood surface.
Repeat if necessary.
After my jewelry box thoroughly dried it was ready to be returned to my dresser as my family photo box. The shine you see on the box edges and carving curves directly comes from Murphy’s Oil Soap.
Tracing a Pattern There are several ways to transfer a pattern to a carving blank – carbon paper, graphite paper and pencil rubbing. All three products transfer a pattern to wood, but which you use is determines by the craft you are working.
Carbon paper Originally used to make multiple copies of a typed or written document, carbon paper comes in black or dark blue. Tracings made using this product have heavy, dark, bold lines. Carbon paper is perfect for transferring patterns for long-term projects, as the traced lines will not fade or rub off, even after many hours of carving work. However, carbon paper creates a traced line that can not be erased with an eraser, and often can not be removed with fine sandpaper. I use carbon paper with my wood carvings, but never with pyrography.
Graphite paper This paper is lightweight with a waxed graphite coating on one side, and comes in both pale gray and white. When tracing a pattern, the graphite side is placed against the wood, resulting in a tracing with medium-gray colored lines. Graphite paper is available in sheets as small 8 1/2″ x 11” (216 x 279mm) and as large as 48” x 96” (1219 x 2438mm), and also comes in rolls several yards long. Graphite paper can be used several times, so keep previously used pieces for later tracings. This product works well for both carving and wood burning.
Pencil Rubbing To use the pencil rubbing method for transferring a pattern, rub a soft #2 to #6 pencil over the back of your pattern paper. The higher the number of your pencil, the darker or blacker the rubbing will be. Then, place the pattern face up on your carving blank and begin tracing it. As you trace along the pattern lines, a thin, light gray coating of pencil will be left on the wood blank. Pencil rubbing lines can be erased using a white artist’s eraser, making it an excellent method for transferring patterns for carvings that will include some pyrography work. This is my favorite form of tracing as it is so easily removed after your pyrography or carving work is done.
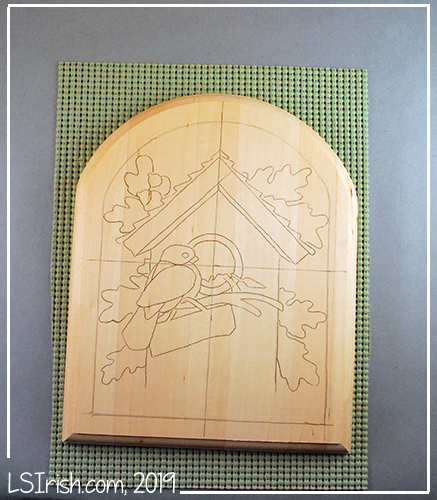
Simple steps for tracing a pattern Tracing a pattern onto your carving blank is an important step; you want to make sure you center the pattern on the wood. Follow these steps to trace a pattern using graphite paper.
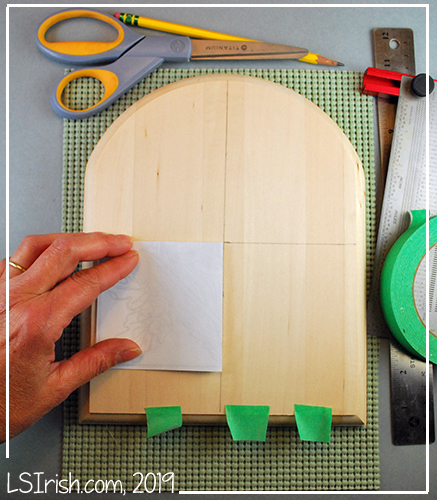
1 Gather your supplies. To transfer a pattern to your wood blank, you will need a copy of the pattern, carbon paper, an ink pen, a ruler, a T-square, and tape.
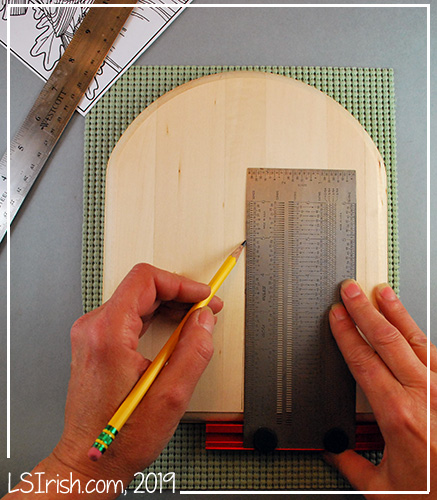
2 Mark the center of the blank. Using your ruler and T-square, mark the center of the carving blank using a horizontal center line and a vertical center line
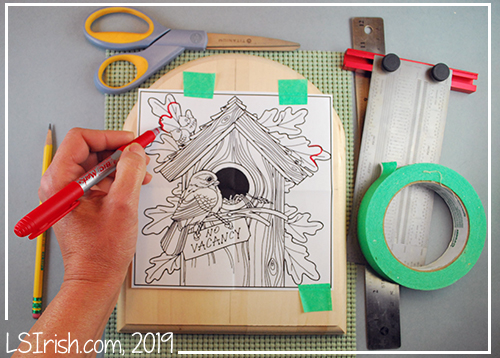
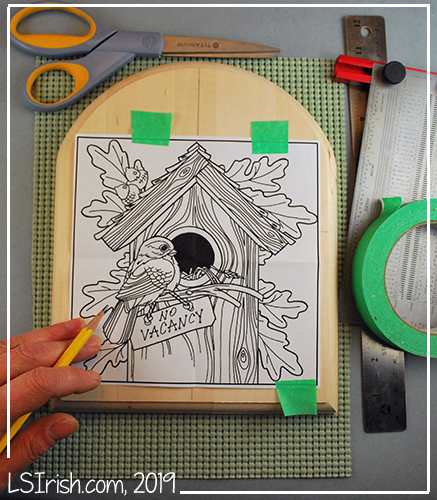
3 Align the pattern with the center lines. Fold the copy of the pattern into quarters. Place the pattern on the blank, aligning the fold lines in the paper with the center lines drawn on the blank. Tape the pattern into place .
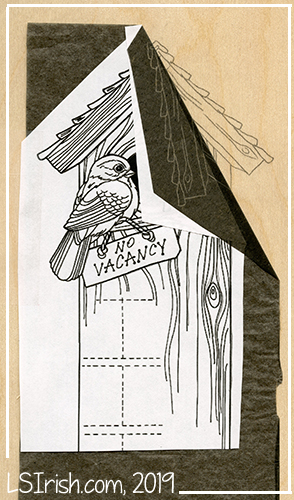
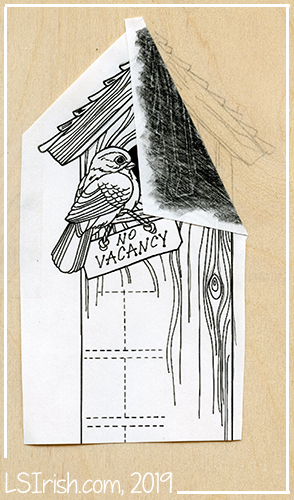
4 Adjust the pattern as needed to fit the shape of the wood. For our sample tracing the board has a curved top that affects the placement of the pattern. By sliding the design down along the vertical line the square pattern is now centered to the square area of the plaque.
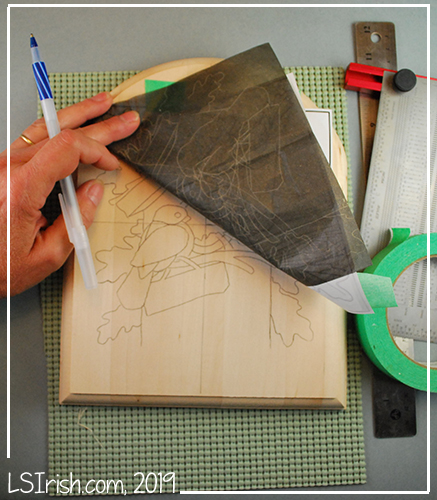
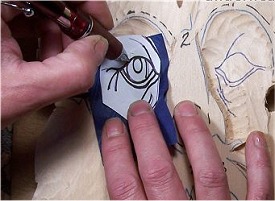
5 Place the carbon paper, and trace. Mark any adjustments necessary on your pattern. Slide the carbon paper in place under the pattern paper, and trace along the outside lines of your grouped elements. Check your tracing before you remove the pattern and carbon paper to ensure you have transferred all the necessary pattern lines .
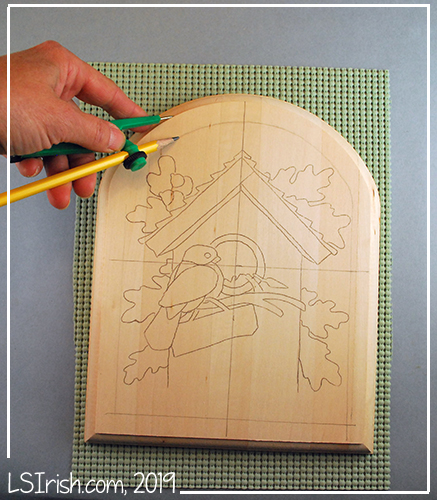
6 Create a border if desired. If you like, you can use a compass to create an outside border or margin line around the pattern .
7 Add in the details as you carve. As you progress through the carving stages, cut small pieces of your original pattern paper, secure them to your wood blank, and trace the fine line details to that roughly cut areas.
8 Print several copies of your pattern. As you work you will often find that your carving will cut away some areas of the traced pattern or that your burned shading will obscure some areas of your traced line. You can cut small sections of your extra pattern out from the larger design and spot trace as needed.