
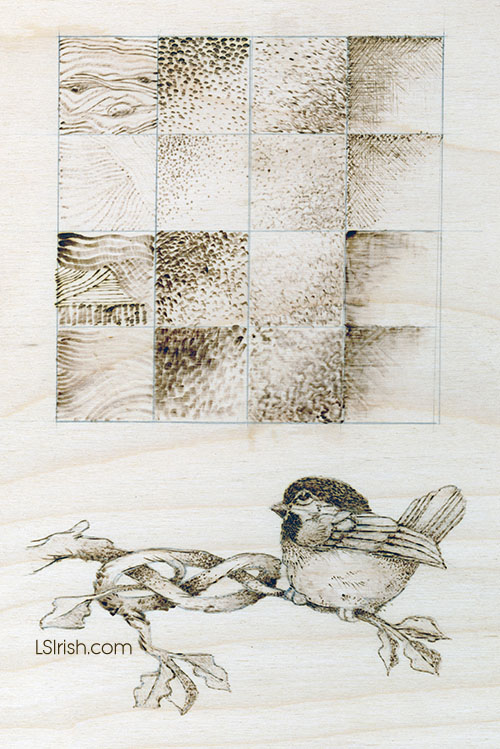
WORKING A SEPIA VALUE PATTERN ON YOUR PRACTICE BOARD
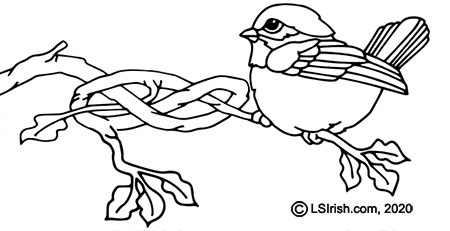
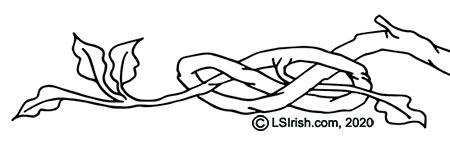 Click on the images for a full-sized, printable copy of the two patterns.
General steps to any wood burning design. As we work through the main project we will look at each step in-depth.
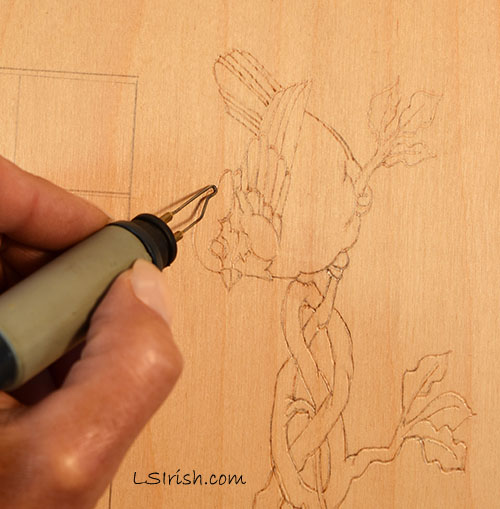
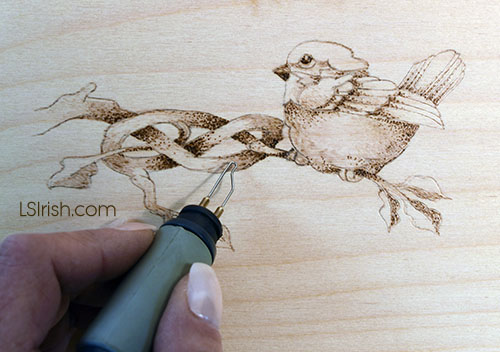
1. Trace or draw your pattern.
On a low temperature setting with a loop tip or ball tip pen, lightly outline the pattern lines. This is just to set the pattern lines so that you don’t accidentally erase them as your hand moves across the board.

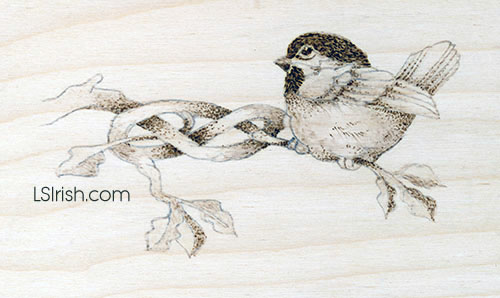
2. Map your shadows.
Again, working at low temperature to create pale tonal values, begin mapping where you want your shadows and shading to fall. In general an object that lies behind or under neath another object will carry a shadow cast from the top object.
3. Make a decision about your background, void space.
Will your background be left un-burned in the palest tonal value, will you burn all of the surrounding area to the pattern to your darkest black tone, or will your background to the pattern hold more design burning as the distant mountains to a barn scene.
You background choice helps determine how dark you want your shading tones to be. For un-burned backgrounds as on our Celtic Branch Bird allows for very dark shading to be used directly in the design. The blackest tones are part of the burned pattern.
With black backgrounds that background holds your darkest tonal value and all design work must be done in a lighter or paler value than the background. On your 1 to 10 sepia scale if your background is worked as a 10 then you pattern burning must be worked in a 9 or lower setting to it to show separately from that background.
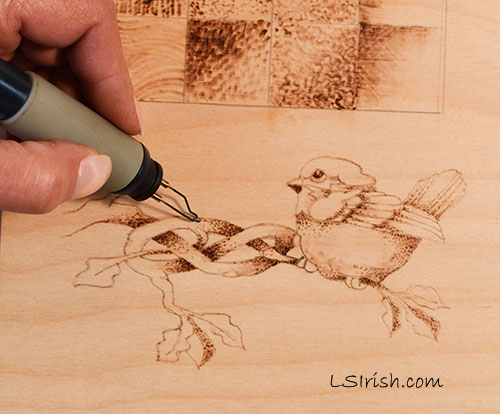
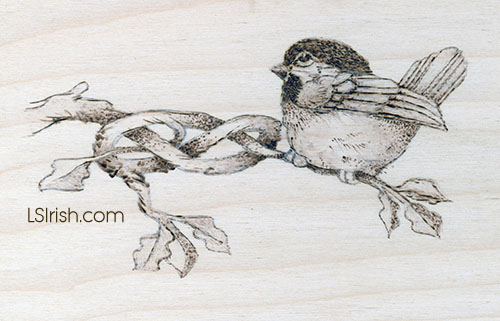
4 Graduate the shading across a full value range.
Graduated shading is worked net where some areas of your design will be burned in pale tones, some in medium tones, and some I the dark tonal value range. This is where you begin to develop the three-dimensional look of your design using the different pen tips and pen strokes. For our Celtic Branch Bird this includes a hot temperature, dot pattern burn on the branches using the ball tip pen. The belly area of the bird is worked in a pull stroke using the spoon shader, and the leaves have a soft, scrubbie stroke on a low temperature setting using the loop tip.
5 Create areas of contrast.
As your design develops you will need to establish both extremely pale areas inside of the burning as well as the darkest tonal values. You only need a few spots of each white and black value to create a strong contrast. For our bird the white highlights are under the eye, the center tail feather, and the top of curve of wood in the knot patter. Our black tones are the eye, the cap and the deep underneath curves of the wood knot.
6 Add your details.
Details are not outlines. They are small sections of an area that is re-enforces with a thin, fine line. Some areas of your burn may need no detailing as the tips of the tail feather for our bird. In other areas use a changing, thick to thin line as around the edges of the leaves. Allow a few areas of your design to have neither an outline or detail … just let the tonal value work stand on its own.
7. Clean and finish.
This little practice project is complete in the burning steps and ready to have any tracing lines or hand dirt erased with an artist eraser, gum eraser, or architect’s pad. You can add coloring through the use of oil paints, water-thinned acrylic paints, or colored pencils to the work. Finish with either an oil finish or spray sealer finish, following the directions of the can.
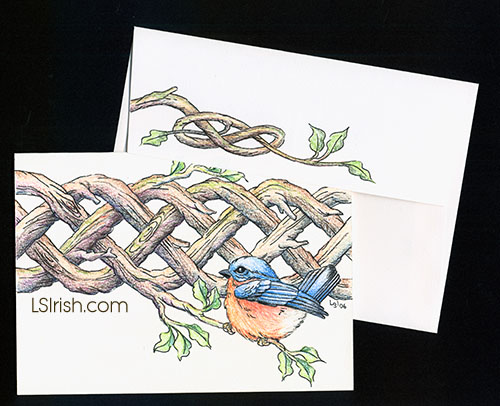
This is our the same Celtic Knot Blue Bird design that we have been exploring as a birch plywood burn. In this sample the burn was worked on heavy-weight art-quality writing paper and matching envelope. Color was added using colored pencils, and the work set with a light coat of matte spray sealer.