
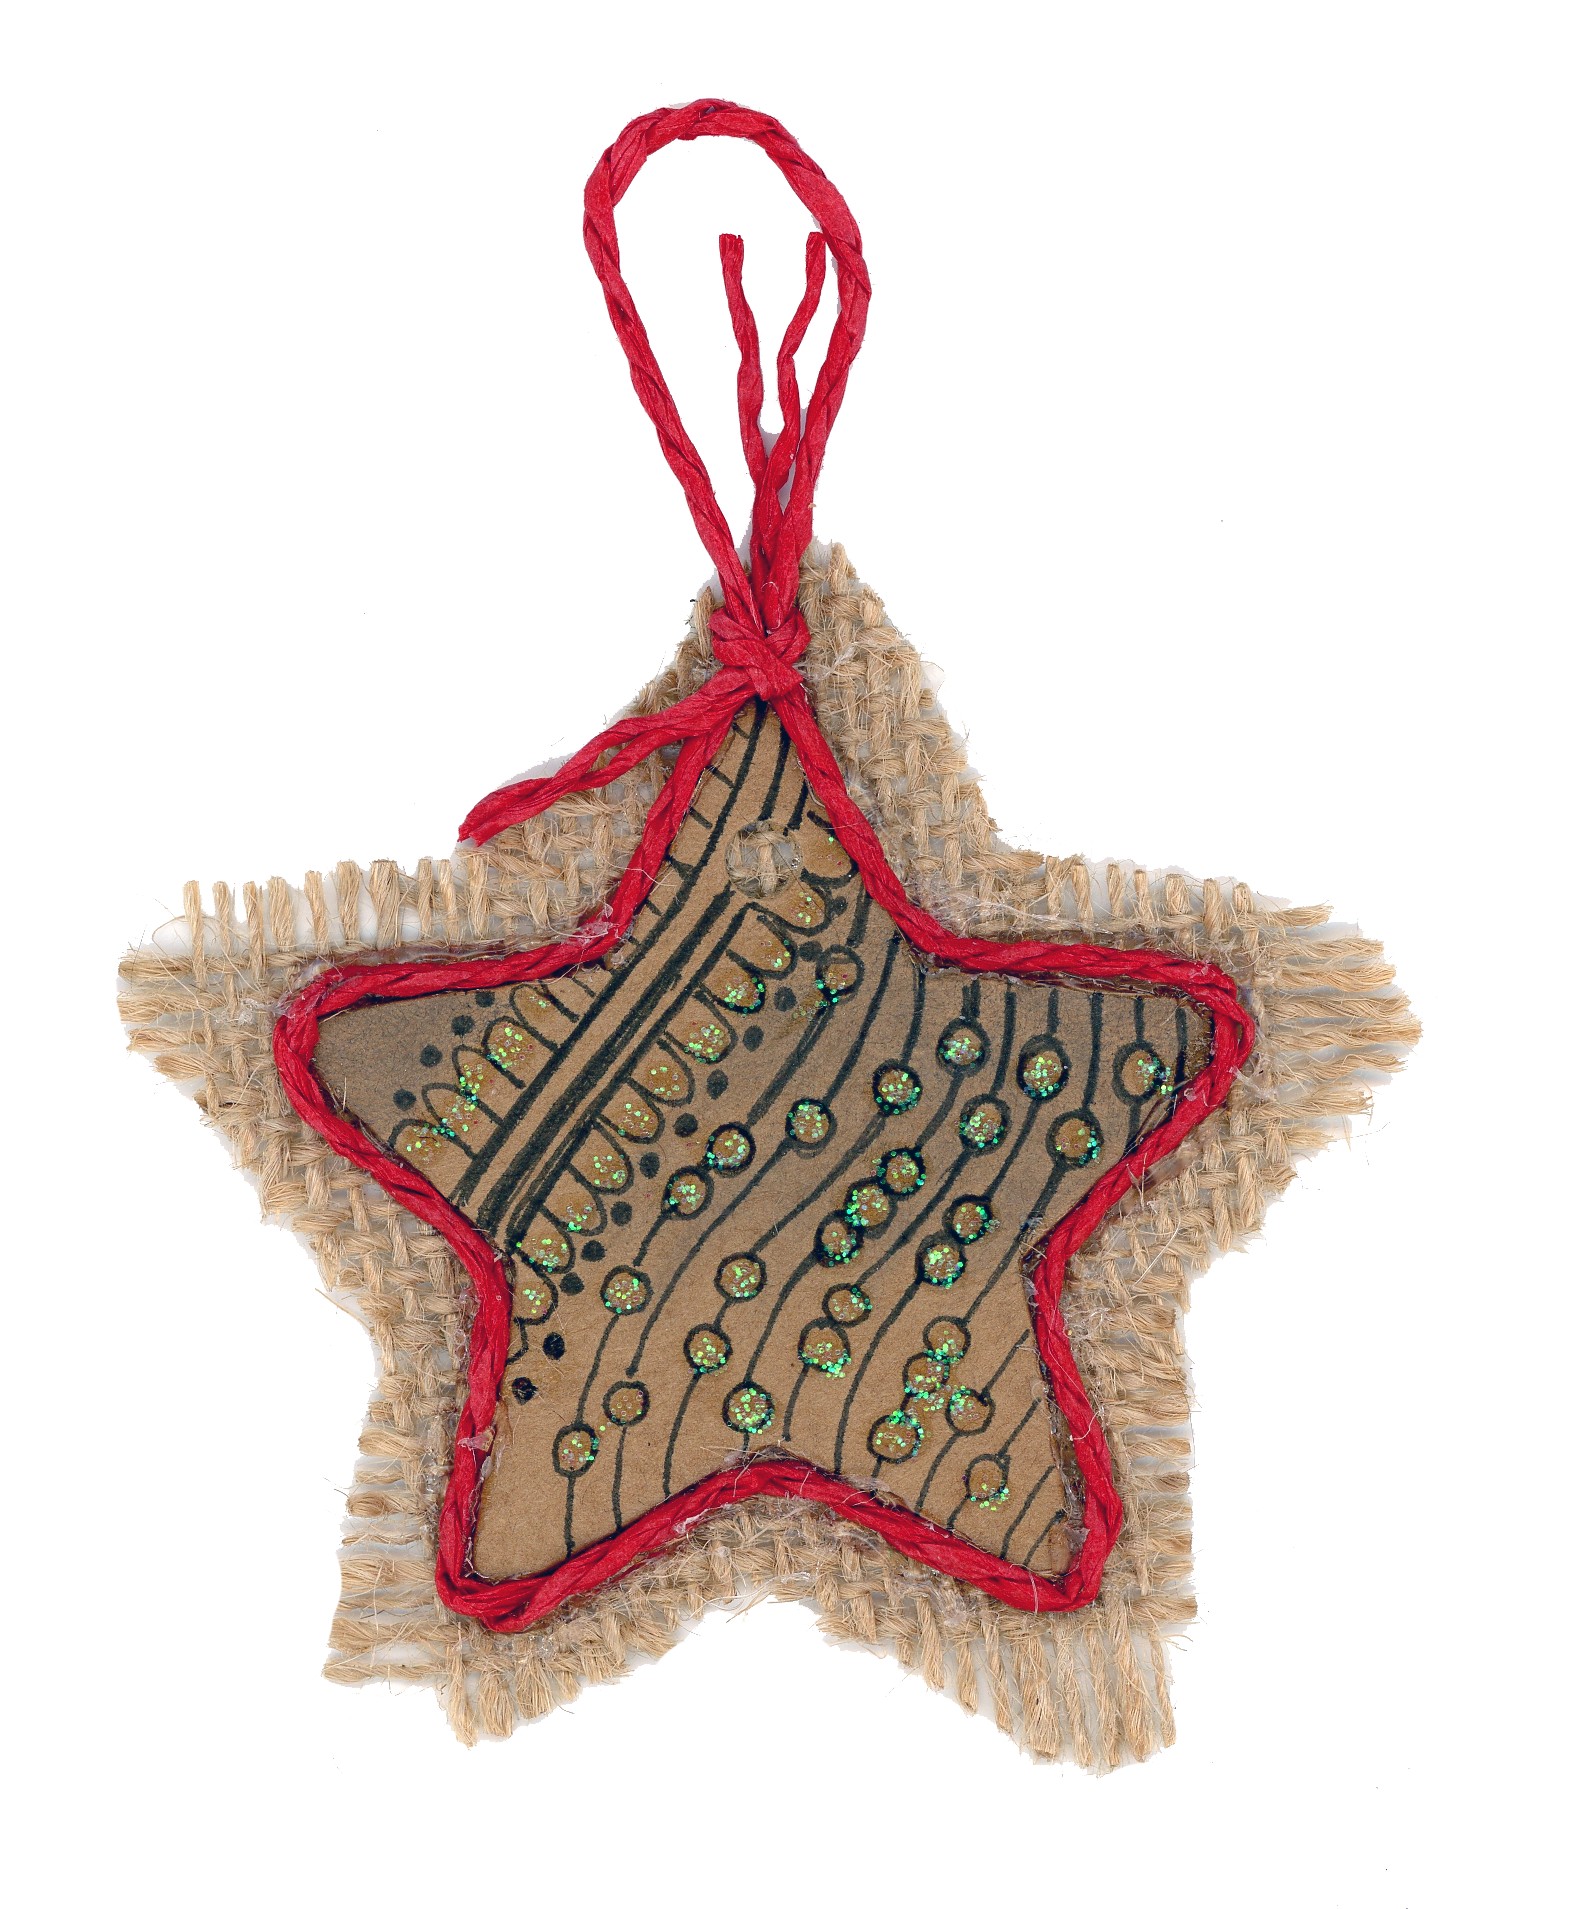
Doodle Day #2 – Christmas Tree Star Tags
DIY Bookmaking, Bullet Journals, Scrap Booking, Card Making, Applique Quilting, Pyrography, Wood Carving, Wood Burn Spoons, Wood Carved Spoons, Leather Work, Free Lora S. Irish Patterns to Download
Yesterday I showed you one of my Christmas Tree Star tags that inspired this morgue file project for me.
 Supplies that I used:
240 Colored Gel Pens Assortment
Acrylic Clear Glue Double Tip Tube
Gold, Silver, and Red Glitter Glue
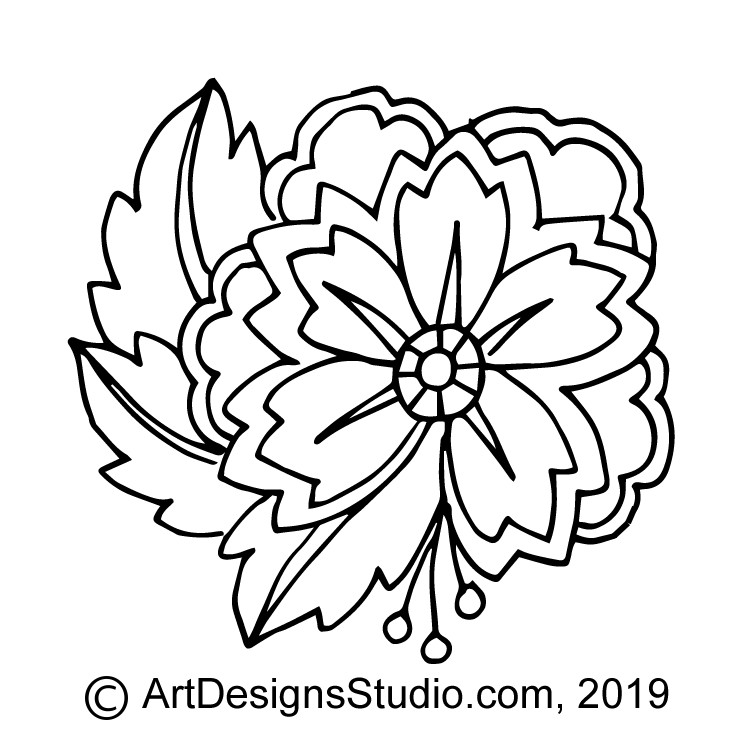
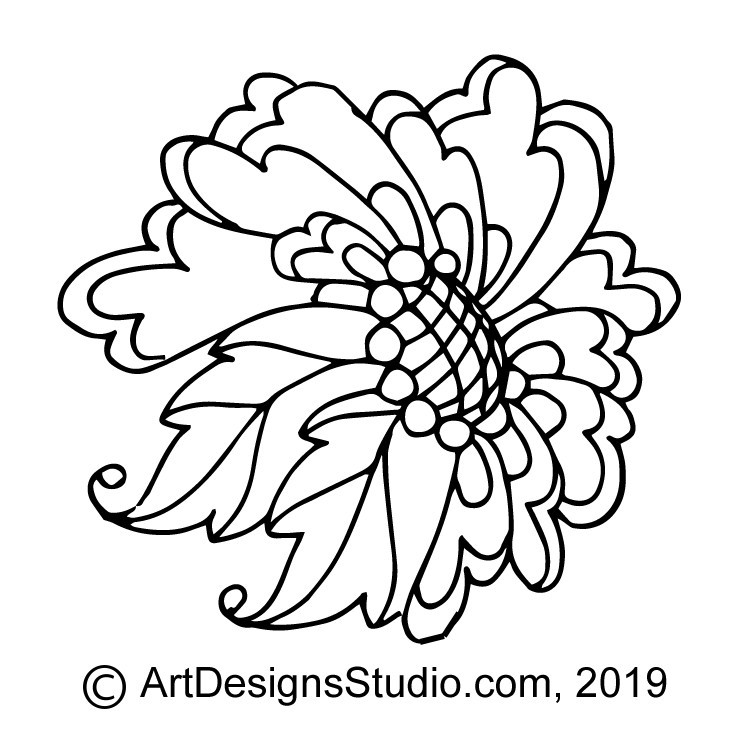
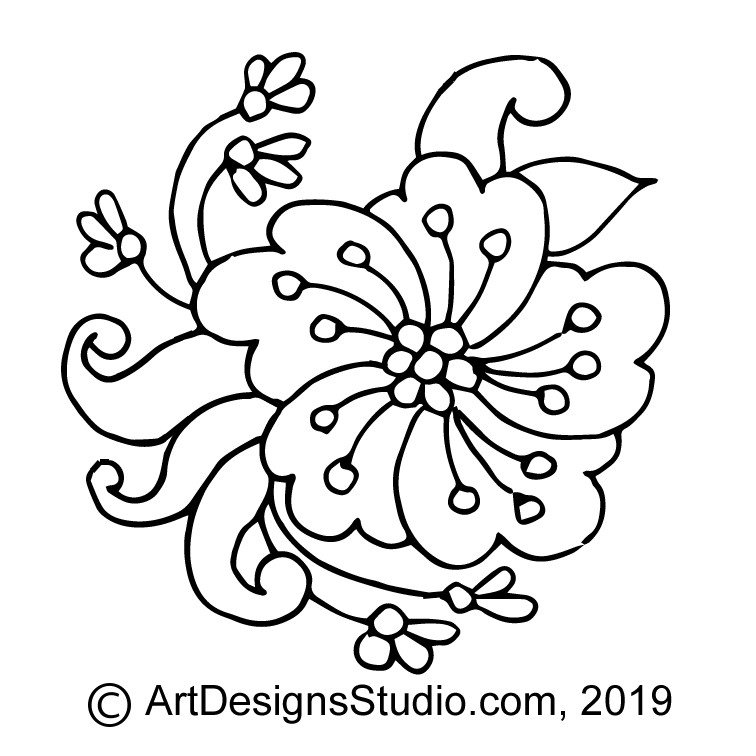
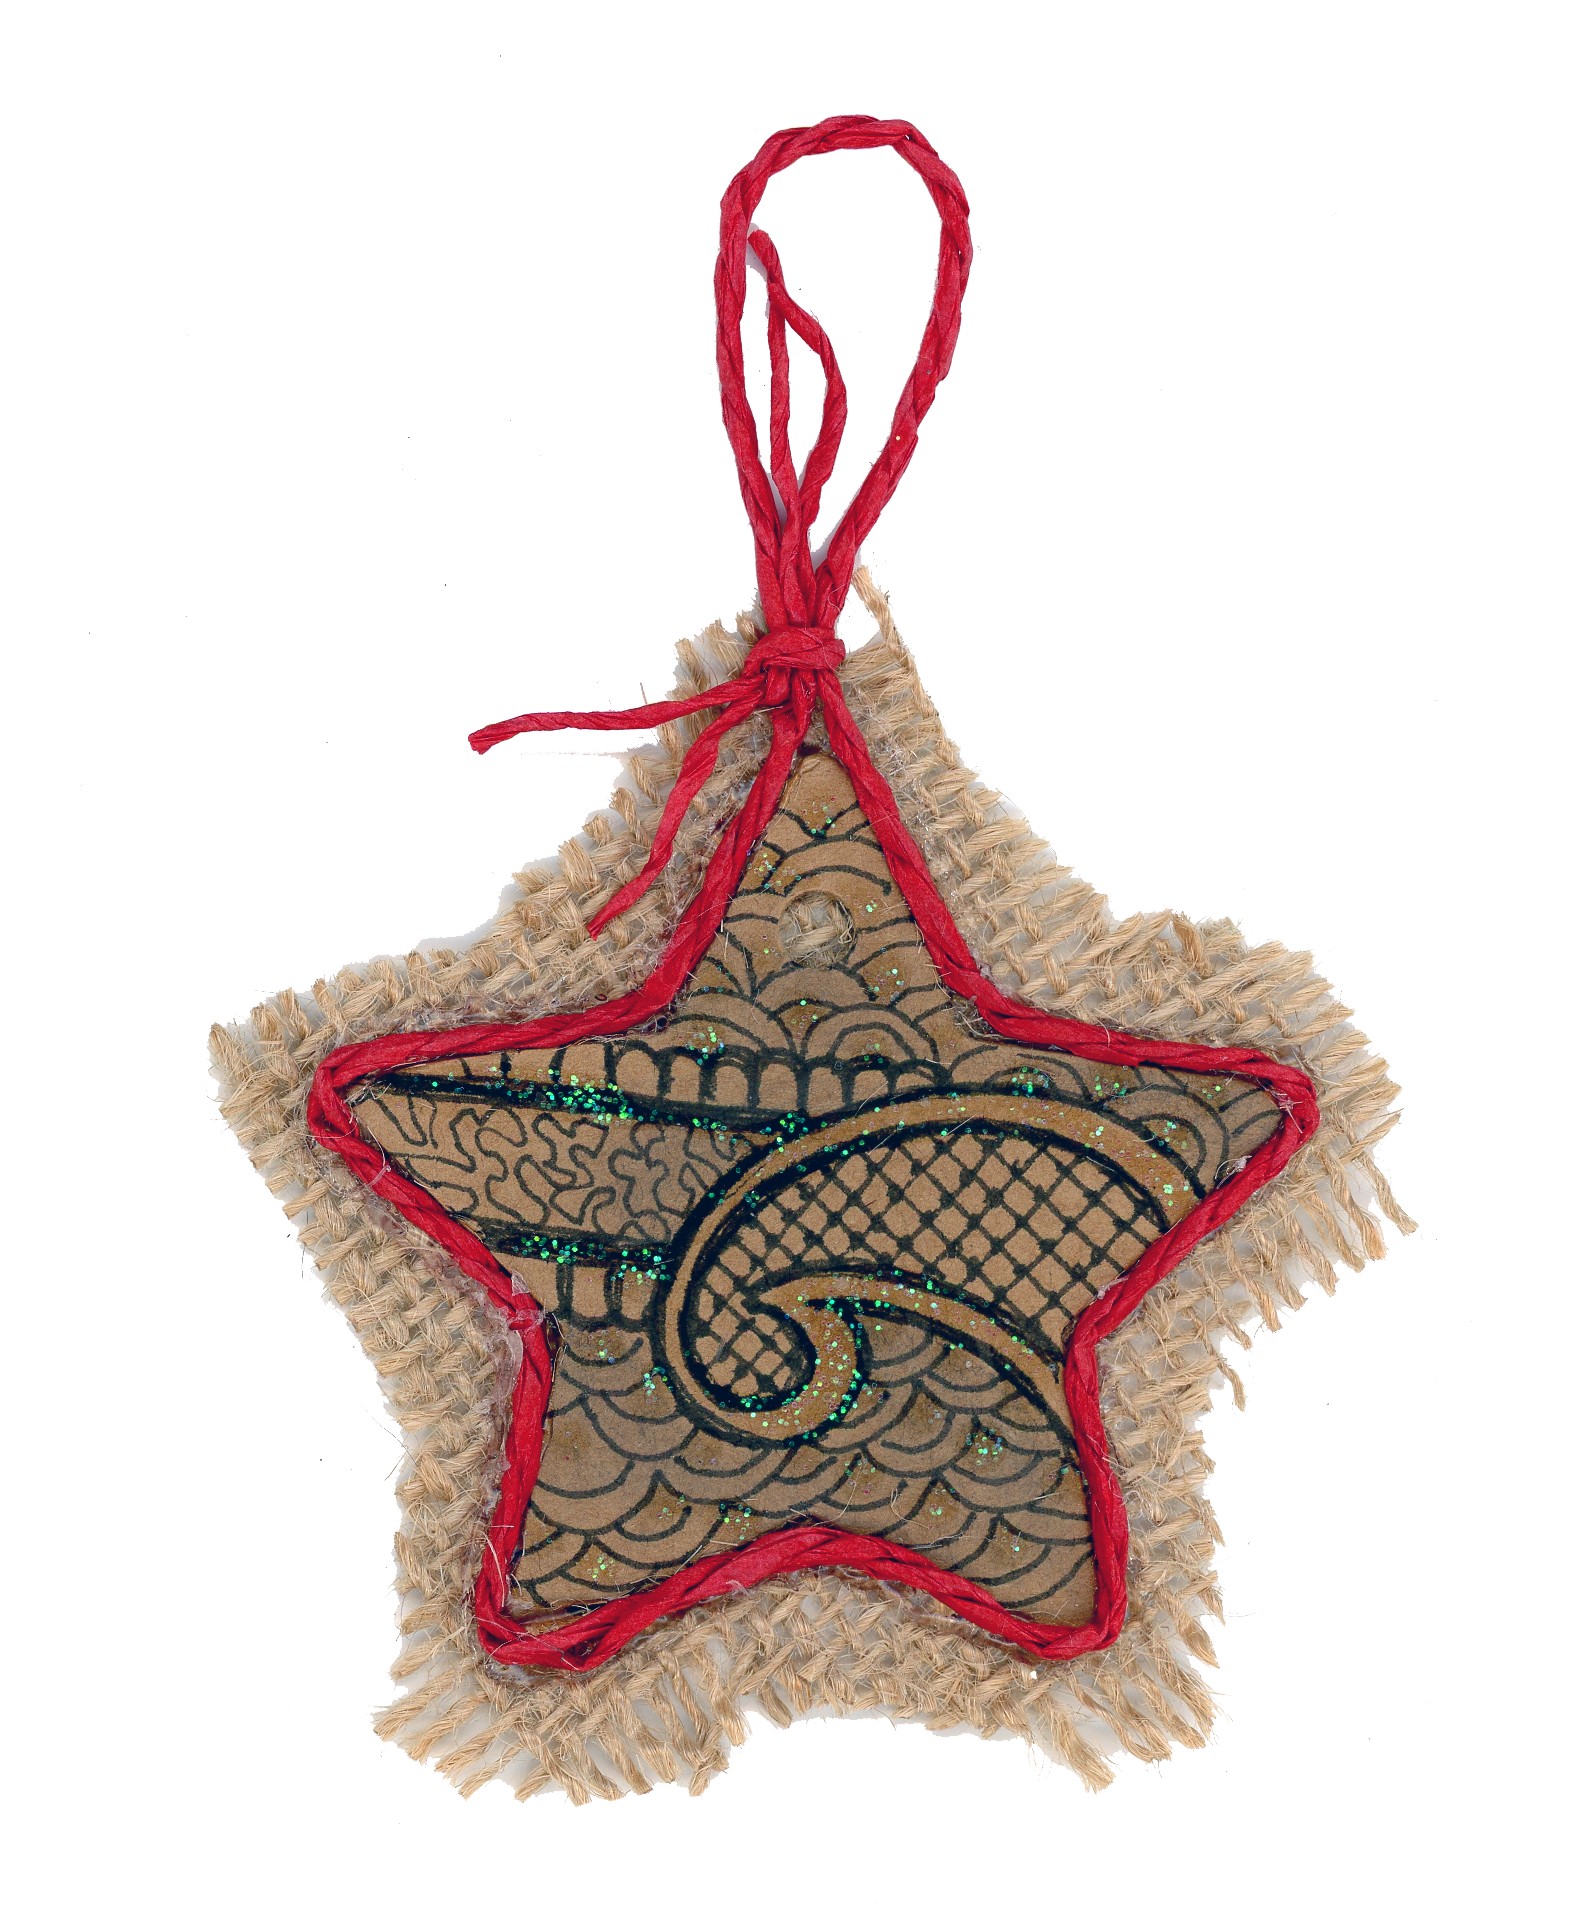 Step 1: You can trace one of the free doodle patterns that I will be posting this month onto your kraft star tag. Begin by printing a copy of the pattern. Cut out the pattern, allowing about 1/4″ to 3/8″ margins. Rub a Soft, #2 to #4 pencil, all over the back of the pattern paper. Lay the pattern, face up, onto your star. With the soft pencil trace along the outlines. When you lift the pattern paper, the graphite from the pencil rubbing will leave a grey trace line on the kraft tag.
After you have finished the pen and ink work and adding any coloring, and allowed the ink to dry well, use a document cleaning pad to erase any remaining graphite lines from your star tag.
Step 2: Use the fine point, black marking pen to create the lines of your doodle design. Rework some areas of the lines with a second layer of black pen to create a ‘thick and thin’ effect – this adds interest to the line work. Let the pen ink dry for at least 10 minutes before you begin the coloring steps.
 Step 3: Clean the tag with your document cleaning pad by gently rubbing the pad over the tag. The pad is filled with finely ground eraser particles and will neatly clean any remaining graphite marks.
Step 4: Add any coloring that you want using the gel pens. You can also use colored marking pens, colored pencils, and even watercolor paint to accent the doodle pattern with just a touch of bright color. Allow to dry.
Step 5: Using acrylic glue, apply one line of glue along the edge of the star tag on the back side of the tag. Lay the tag onto the burlap ribbon. Weight the tag down against the ribbon with a heavy book. Allow to dry for at least one-half hour.
Step 6: Cut the burlap 1/4″ to 3/8″ away from the edge of the star tag to create a fabric frame. You can tease a few strands of burlap off to make a ragged edge. Turn the burlap-back tag face down onto a piece of wax paper. Run a thin line of acrylic glue along the outer edge of the burlap to stop any further raveling of the fibers. Let the glue dry for at least one-half hour.
Step 7: Run a thin line of hot glue along the outer edge of the tag, on the burlap back. Begin by allowing a 4″ tail of paper twine string before you begin gluing. Gently press your paper twin string onto the glue. This covers the joint line between the tag and burlap, while framing the tag area. Work one straight side of the star tag at a time. This will let you easily make the sharp inside corners crisp. Cut the paper twine string 4″ away from the tag, when you have glue the entire outer edge of the tag. Tie the two paper twine ends together, once close to the tag and once at the end of the strings to create your hanging loop.
Step 8: To add that extra holiday sparkle, use glitter glue in the design area. Let the glitter glue dry completely and your star tag is ready to hand.
See you tomorrow, thanks for reading ~ Lora Irish
 The Art of Leather Burning by Lora S. Irish
Available on Amazon.com
DIY Bookmaking, Bullet Journals, Scrap Booking, Card Making, Applique Quilting, Pyrography, Wood Carving, Wood Burn Spoons, Wood Carved Spoons, Leather Work,
Free Lora S. Irish Patterns to Download