October 29, 2015

Henna Moon Pyrography Project by Lora Irish

Walnut Hollow Woodburner Detailer – 5

We are continuing the step by step instructions for this Henna Moon Pyrography Project and the test drive review of Walnut Hollow’s Woodburner Detailer.

Please click on any image in this post for a full-sized photo.

Henna Moon Pyrography Project
Walnut Hollow Woodburner Detailer – Introduction
Walnut Hollow Woodburner Detailer 2 – History of Henna Tattoos
Walnut Hollow Woodburner Detailer 3 – Tracing the Pattern
Walnut Hollow Woodburner Detailer 4 – Outlining the Design

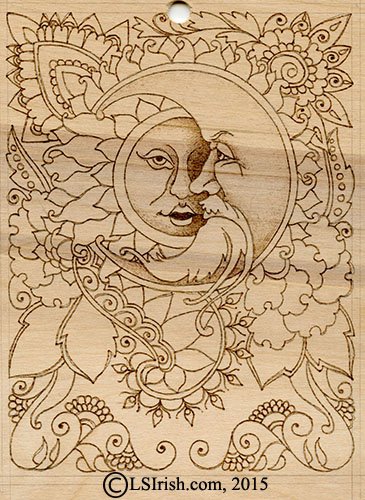
Our tracing pattern is the line art for just the outlines of each element in this Henna Moon design.  During these steps we will work to fill each element and areas inside each element with Henna-styled details and patterns.  You can re-burn the same line art outline time and time again, and create new projects by changing which pattern elements you fill with shading and which fill patterns or textures you use in each element.

Simple pyrography shadingSimple Shading in the Henna Flowers

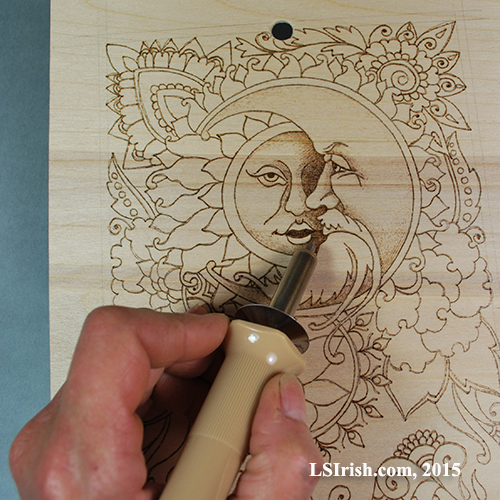
Step 9: Henna tattoos often feature stylized flowers, detailed leaves, and repeat patterns of circles, arcs, or triangles.  After the outline for each element is complete that element – flower, leaf, scroll – is detailed with small repeat patterns as spiral curls, wavy lines, lattice lines, and stems with bud dots.

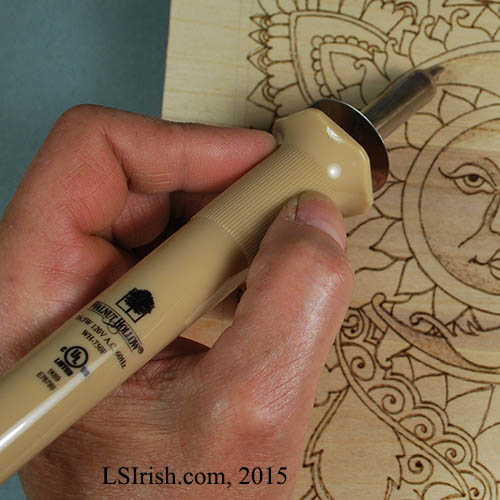
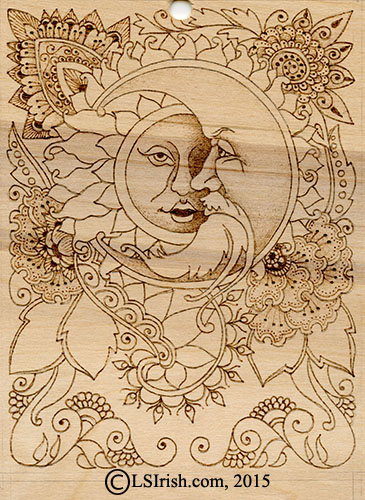
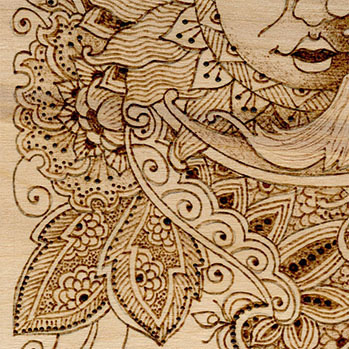
I began the inner detailing of my henna tattoo elements by working the four large flowers that surround the Sun and Moon faces.  Using a light pressure touch with the pen tip of my Walnut Hollow Detailer and a tightly packed scrubbie stroke I created a pale tonal value shading in the flower petals.  That shading is placed at the bottom of each petal where it tucks under another petal.  The outer edge area of each petal was left unshaded – unburned.  This gives a white area to the upper petal and a dark area to the lower petal.

Note:  Even when using simple shading I still want some areas left un-burned to become my white tonal value, some pale sepia tones, some medium tones, and some dark tonal values.  In Henna Tattoos that pale and medium tones come from light pressure, fine line strokes.  Deep mid-tones and blacks come from touch-and-lift dot stokes.  The blackest tones are tightly packed touch-and-lift dots.


Henna Tattoos for PyrographyLine Detailing in the Sun Rays

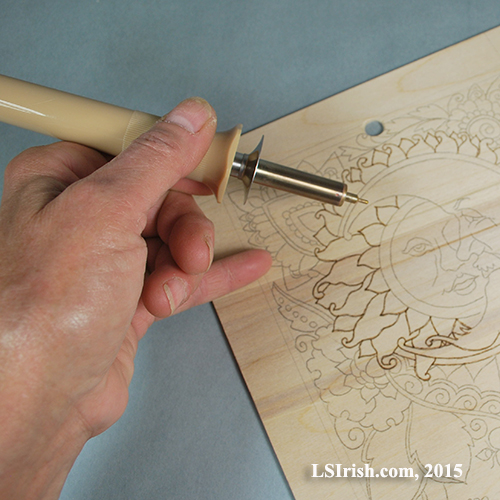
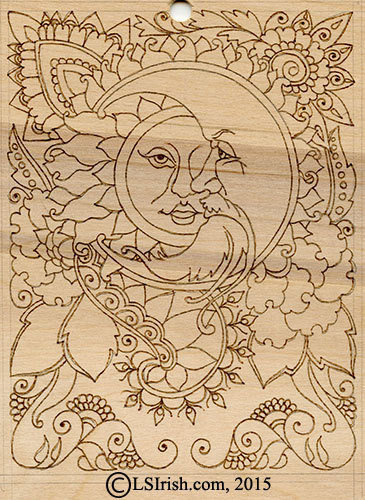
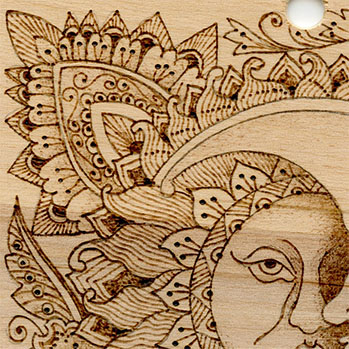
Step 10: The outer ring of sun rays was worked in a simple long wavy line that followed the outline shape of one side of the ray.  The sun rays that lie behind the upper curve of the moon are accented with small dots, worked along a diagonal line.  This is just a touch-and-lift stroke with the ball tip of the Detailer.

Note:  You can use just about any geometric pattern, line pattern, or texture fill stroke to create the detailing inside of your flowers, leaves, and scrolls in Henna Tattoos.   So for each flower chose or create a new fill pattern, and use that pattern for each of the petals in the fill.  Leaves, paisley-shapes, and scrolls can be either pattern filled or area where you wood burn a small flower and leaf motif.


Henna Tattoos for PyrographyDetailing the Sun Circles

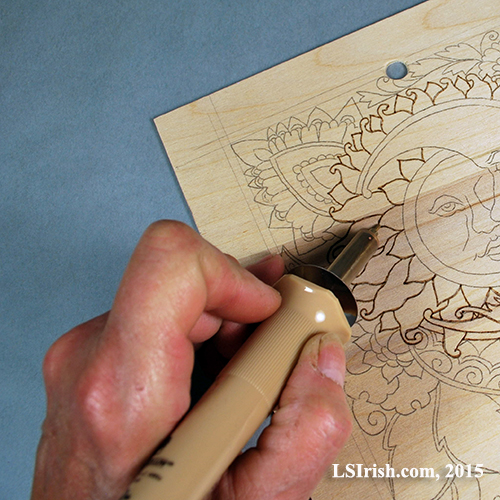
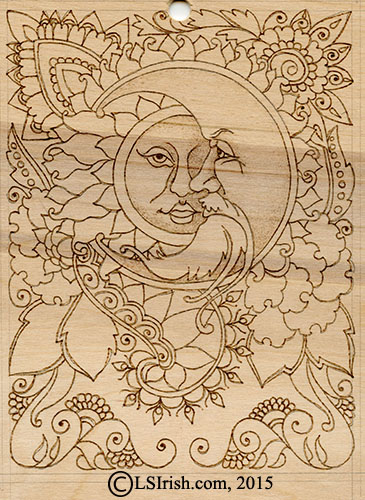
Step 11:  A stem-and-bud dot pattern was used in the inner row of Sun rays and a triangular pattern fills the circle that encompasses the Sun face.

Note: As I worked the Sun rays from the outside towards the inner ring near the face I packed my strokes tighter.  I have not changed my temperature setting or how much pressure I am using on the pen.  Adding more lines into an area darkens the tonal value appearance of that area. 


Henna Tattoos for PyrographyCreating the Leaf Details

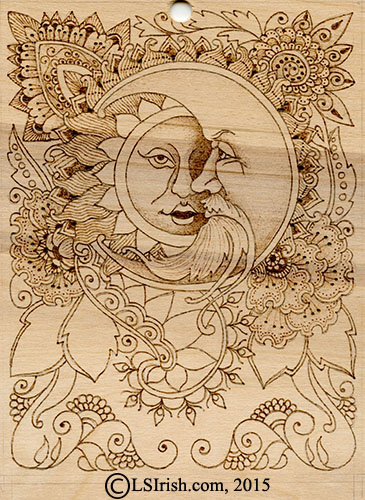
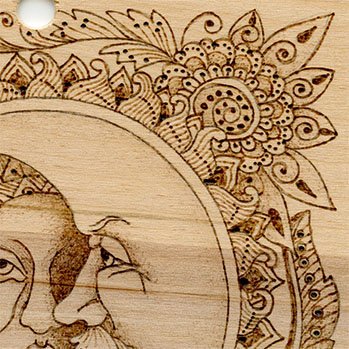
Step 12:  The leaves of a Henna Tattoo are just as decorative as the flower petals or scrolls.  One set of leaves uses a line stroke with a circular spot in the center.  Another group of leaves has an inner outline with the outer border worked in parallel lines and the inner area in a small flower pattern.


Working the Lower Scroll Element

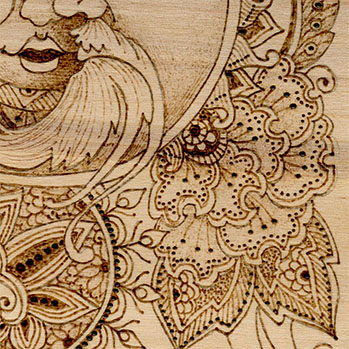
Step 13:  I have added the shading and detailing to the lower scroll element by using a leaf and scallop design inside of the scroll.

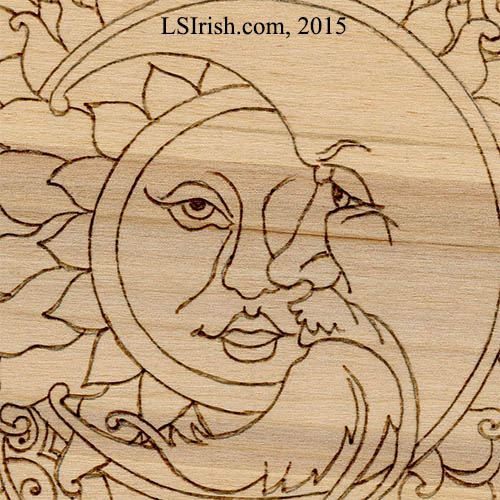
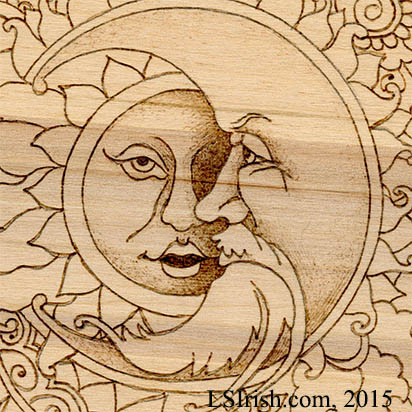
Detailer Review:  At this point in the burning I have worked for about three hours.  The Detailer, throughout this entire time, has never skipped a beat.  It has held a consist, constant, even temperature with each and every stroke.  As you look at the close-up, below, you can see I still have no hot spots where one line intersects or turns and angle, I have no scorch marks, and my line work is the exact same tonal value throughout the stroke’s pull.

c-up 002


I will be posting the final steps to this project tomorrow, Friday, Oct. 30th.  We will work the bottom accent elements, then create the pencil guidelines and burn the border trim.  Plus tomorrow I will give you my final decision on how the Walnut Hollow Woodburner Detailer has preformed … but, I expect you already know I am totally delighted with its performance throughout this project.

PS – At this point, three hours in, I still have no carbon build-up on the ball tip of the Detailer and not one gray-black carbon smudge because of a dirty tip … big grin!!!!

Walnut Hollow Woodburner Detailer – 5 Read More »

Henna Tattoo Moon Face Pyrography Project

Walnut Hollow Woodburner Detailer – 4

Walnut Hollow Woodburner DetailerWe are taking the Walnut Hollow Woodburner Detailer out for a test drive to discover it capabilities, advantages, and disadvantages for use in our wood burnings. Why would I buy another wood burning unit when I already have a high-end burning unit or the Walnut Hollow’s Versa-Tool?

Please click on any of the images and photos for a full-sized close-up.

The Versa-Tool uses 120 volts, 25 watts, and reaches 950 degrees F.  It has an in-line variable rheostat that allows you to set your temperature range from very pale tonal value settings to very black burns.  It comes with a five interchangeable burning tips, hot-knife tip, soldering tip, soldering wire, and three hot-stamp points – at a retail cost in the US of $29.99.

The Woodburner Detailer is a  one-temperature tool with a setting of 120 volt, 16.5 watt, 750 degrees F (398.89C) unit, and has an on/off inline switch.  It comes with just one small ball tip.  The Detailer sells for $14.99.  For this unit you can purchase extra tip profiles either individually for in prepackages sets of five.

Let’s find out why I would want a burner that has less power, less temperature variability, less tips, even if it is a half the price of the Versa-Tool.  As I work through the burning steps for this Henna Tattoo Moon Face pattern I will be commenting on how well I think the Detailer is preforming.  Please remember, this is just my opinion.


Henna Moon Pyrography Project
Walnut Hollow Woodburner Detailer – Introduction
Walnut Hollow Woodburner Detailer 2 – History of Henna Tattoos
Walnut Hollow Woodburner Detailer 3 – Tracing the Pattern

Walnut Hollow Woodburner Detailer

Walnut Hollow Woodburner DetailerStep 1:  The Detailer has the classic Walnut Hollow handle style that is 4 3/4″ long and 3/4″ wide at the top – a little thicker than a kindergarden writing pencil.  Top area of the handle is tightly ribbed to give you a strong, non-slip grip.  Above the grip the handle flares to protect your fingers from the heat of the tool tip and to prevent your hand from slipping onto the hot brass tip tube.  The on/off line switch is about 18″ from the base of the tool – long enough that the switch does not interfere with the pen’s movement, but close enough for easy reach.

Basic Hand Position in Wood Burning

Hand position in wood burningStep 2:  Your hand position in wood burning is extremely important.  As with all soldering-styled burners, the Detailer places your hand slightly farther away from the burning surface than high-end burning pens.  From the handle flare to the pen tip is about 2 1/2″, where the distance on my Optima pen from my finger grip to the pen tip is about 1 1/4″ to 1 1/2″.

With both pen styles – the Optima and the Walnut Hollow – I use a light pressure writing grip resting the pen between the first two fingers of my hand on one side of the pen and my thumb on the opposite side.

Because I want as much free-motion to my hand movements as possible I do not rest or support my hand directly on the wood surface.  The side or base of my palm never touches the wood.  Instead I extend my small finger until it touches the wood and use that finger’s tip as an anchor or balance point. I have exaggerated the hand position in this photo so that you can see how the small finger is the only part of my hand that comes into contact with the burning surface.

Hand position in wood burningStep 3:  In this photo I am showing my normal hand position.  You can see the two finger/thumb grip and in the shadowed area, right behind that grip you can see the tip of my small finger against the wood.

The only part of my hand or arm that is holding the pen that touches anything is that small finger.  This position and grip gives me a full range of motion as I pull the burn stroke.  Please note that I do not grip my pens as tightly as shown in this photo … that tight grip comes from holding my hand still while waiting for the camera to take the photo.  A better image of grip pressure is shown in the photo below.


detailer-5Step 4:  That extended small finger also lets me adjust the pen tip to use any part of the pen tip – from a very high off the wood position using just the point to a very low angle to the wood that allows the side of the pen tip to burn the stroke.


Outlining a Pyrography PatternOutlining a Pyrography Pattern

Step 5:  Plug your Walnut Hollow Woodburner Detailer into a surge protector electric strip for general safety.  Allow the pen tip to heat for several minutes to reach its full temperature setting.

Note:  In any burning session around the studio I have a practice board on my table as well as the project board.  A practice board is just a piece of scrap wood that is the same wood species as my project.  I can use that board to practice strokes, experiment with textures, and in this project check the burner to see if it is at full temperature.


Outlining a pyrography patternWith a light pressure grip, using the small finger as your anchor point, begin outlining your traced pattern lines.  As you pull these initial lines you want a slow, even motion to create smooth curved lines.  Remember a smooth, even burned stroke is more import than exactly following the pattern lines.  Those pattern lines will be erased at the end of the project.

Detailer Performance: With this very first step in the burning I knew I loved the Walnut Hollow Detailer!  Look closely at the moon and sun face photo.  The outlines are all of the same thickness, and all of the same tonal depth.  There are no thin, week areas in the outline and no hot spots were I paused to turn the pen tip in the curve or at an intersection line.  And not one scorched or haloed burn that can happen with a very hot tipped pen.  That outlining looks as if it could have been printed right onto the wood.   With my first go at using the Walnut Hollow Detailer I achieved what I would consider my best outlining step ever !!! I love it !!!

If this burner does nothing more than allow me to create perfect outlines every time, it has already earn its right to be on my photography table.

Simple Face Shading in PyrographySimple Face Shading in Pyrography

Step 6:  With the outlining complete, lets see how the Detailer preforms as a shading tool.

With a very light pressure on the pen tip, I have worked a tightly packed scrubbie stroke into the two faces – my moon and sun.  The shading for both falls of your right hand side of the element.  Because the sun sits behind the moon, her face shading will become the darkest tonal value in this burn.


Simple Face Shading in PyrographyStep 7: More shading has been added to the two faces by working a second light-pressure scrubbie stroke over the shadow areas.  A third layer was worked on the sun face in the right side eye area and the right side of the mouth to gradually dark her face and push it behind his un-burned nose and mustache.

The eye pupils, and the inside of her open mouth was burned to a dark tonal value using a simple touch-and-lift dot pattern.  By allowing the pen tip to rest for a moment on the wood the dot burns to an even black spot.


Simple face shading in PyrographyStep 8:  Here’s a close-up photo of the face shading.

Detailer Review:  Creating pale tonal values with the Detailer is done by simply adjusting the pressure on your pen tip!  A light, even moving touch creates smooth pale tonal values.  Adding layers of light-pressure strokes quickly brings the tonal values into the mid-range.  There is no waiting for the pen tip to cool as I would with my high-end burners. 

So at this point the Walnut Hollow Woodburner Detailer is creating perfectly even, smooth outlines, and a nice range of tonal values.  There is one more note here, which sadly I did not think to capture in a photo.  Even though I have been burning for about an hour at this point in the work and have created an area of dark and very dark tonal values there is no carbon build-up on the pen tip.  The tip is as bright and clean as when I began burning.

In the next posting we will be working the Henna Tattoo flowers and scrolls and adding to the facial shading.

While I work on the next posting, here are a few links you might enjoy:

Contrasting Tonal Values – How to use black and white to create drama in your burnings.

Mushroom Pyrography Doodles – Using textures, fill strokes, and patterns to create your shading.

Tonal Value Worksheet – Create a sepia tonal value scale using your wood burner.

Walnut Hollow Woodburner Detailer – 4 Read More »

Scroll to Top