
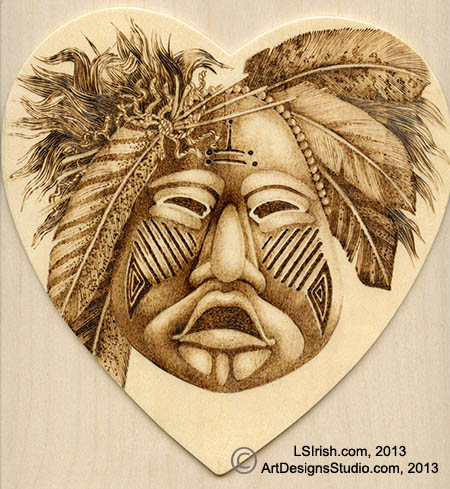
 This project begins with the transferring and tracing your pyrography pattern to your wood plaque, a brief discussion of poplar as a pyrography wood, and we will start the first shading steps in the face of this Ceremonial Mask Pyrography Project.
Ceremonial Mask Pyrography Project 1
Ceremonial Mask Pyrography Project 2
Ceremonial Mask Pyrography Project 3
Ceremonial Mask Pyrography Project 4
Ceremonial Mask Pyrography Project 5
Creating a Practice Board
Working a practice board before I begin my main project is the most important preparation step I can take. On a scrap piece of the same media that I will be burning my large design I can experiment with my pen tips, texture and stroke patterns, temperature settings, and the speed I move my burning pen. I will even work small portions of my large design to establish my shading and shadows before I go onto the main work.
For this morning’s practice board I have chosen a simple daisy pattern, worked on birch plywood. The practice board is found on Simple Shading in Wood Burning, Daisy Pattern. For the first shading steps of our Ceremonial Mask design we will be using long, pulled strokes made with the spear or curved shading tips. The daisy pattern uses that stroke line and will give you the opportunity to learn the stroke before you begin your mask. Learn more about Practice Boards in Pyrography and Tonal Value Sepia Worksheet.
1. Transferring your pattern

1. Using 220- to 320- grit sandpaper, lightly sand your board to remove any imperfections or small, loose wood fibers along the edge. Work your sanding with the direction of the wood grain to avoid cross-grain scratches caused by the sandpaper. Remove the sanding dust with a clean, dry cloth.
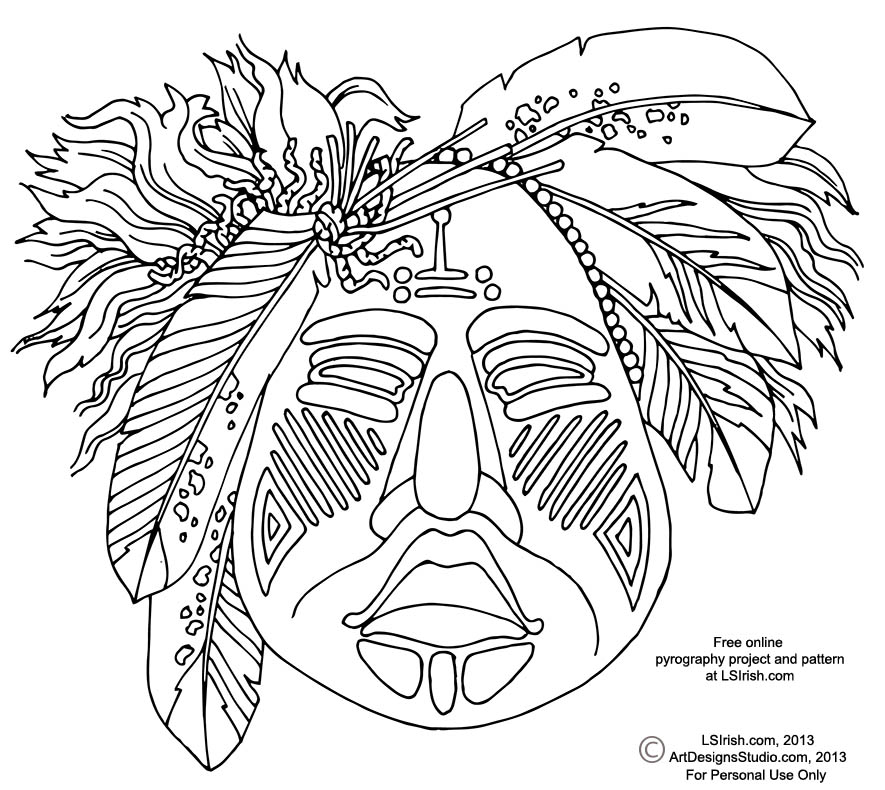
2. Click on the full size – 9″ x 8″ – pattern and save a copy to your computer. Print one copy for tracing. Fold your printed pattern along the center of the face, matching the sides of the face.
3. Turn your pattern to the back. With a #2 or softer artist pencil rub the back with an even, dark coating of pencil graphite.
4. With a pencil and ruler, mark the center vertical line of your board.
5. Align the center fold of the pattern paper with the center pencil line on the wood. Secure the pattern paper on one side using masking or painter’s tape.
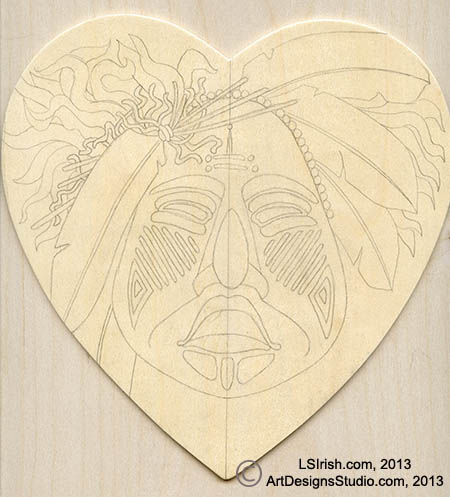
6. With an ink pen, trace along the pattern lines of the design. Lift one corner of the pattern paper to check that you copied all of the design.
7. Remove the pattern paper and tape.
8. With a #2 artist pencil you can add extra feathers, raffia strings, or bead lines to your design to enhance your pattern.
For more information: How to Transfer Your Pattern to the Wood, Creating a Pounce Pattern, and Enlarging and Reducing a Pattern
2. Mapping the Right-Side of the Face
Poplar is extremely soft wood and indents easily along the burning lines. When your project is complete you will be able to physically feel the texture on the wood left from the burning strokes.
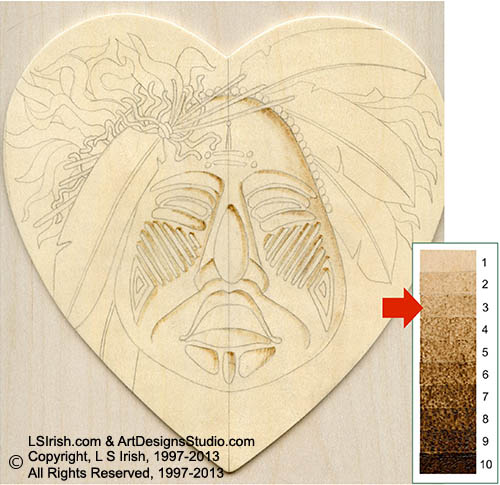
To keep the physical texture to a minimum, the first step in shading any area is to map the tonal value with a spear shader, low temperature setting, and long pull strokes.
With the spear shader pen tip on the flat of the shader, and a #3 medium-pale tonal value setting, shade along the top right-hand sides of the raised elements in the face with long pull strokes.
Shade cheek areas around the top edges of the diagonal face decoration lines.
For more information: Mapping your Pyrography Pattern and Simple Pyrography Shading
3. Mapping the Left-Side of the Face
The light source for this project is set in the upper right- hand corner of the pattern. This places the brightest highlight on the mask’s upper right-side of the forehead and on the right-side of the nose ridge.
Using the flat of the spear shader and a #4 dark-pale to #5 light-medium tonal value temperature setting, shade the left-side of the face using long pull strokes.
During this step I did not work the left-side of the nose ridge or the left-side of the raised elements of the face. Note that a pale, unburned area is left inside the diagonal lines on the left-side.
For more information: Pyrography Steps for Portrait Burning
4. Mapping the Left-Side of the Face

The light source for this project is set in the upper right- hand corner of the pattern. This places the brightest highlight on the mask’s upper right-side of the forehead and on the right-side of the nose ridge.
Using the flat of the spear shader and a #4 dark-pale to #5 light-medium tonal value temperature setting, shade the left-side of the face using long pull strokes.
During this step I did not work the left-side of the nose ridge or the left-side of the raised elements of the face. Note that a pale, unburned area is left inside the diagonal lines on the left-side.
Tomorrow – Tues, Nov. 5, 2013 – we will continue working on the face shading. Hope to see you in our virtual classroom. Please add any comments, questions, or thoughts! You input is very welcome. Thanks! Lora Irish
Pingback: Ceremonial Mask Pyrography Project | LSIrish.com
Pingback: Ceremonial Mask Pyrography | LSIrish.com